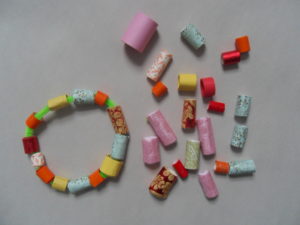
Tag Archives: pipe cleaners

RECYCLED CRAFT PROJECT: PAPER BEADS

RECYCLED CRAFT PROJECT: PAPER BEADS
PAPER BEADS

PAPER BEADS

MATERIALS:

Brightly colored paper from magazines, scraps of gift wrap, catalogs, etc. or craps of thin paper stock.

White glue or glue stick

Scissors

Pieces of Yarn, string, fishing line, plastic-coated wire,or pipe cleaner etc.

Additional embellishments: tiny beads, glitter, small stickers (optional)


PROJECT:

  1. Cut long skinny triangles of paper, approximately 1” wide and 4” long.
  2. For each bead, smear glue on half of one triangle toward the tip.
  3. As you roll each triangle up, leave a hole through the middle for your string to go through.
  4. When the glue has dried, string the beads into necklaces, bracelets and even garlands.

VARIATION:

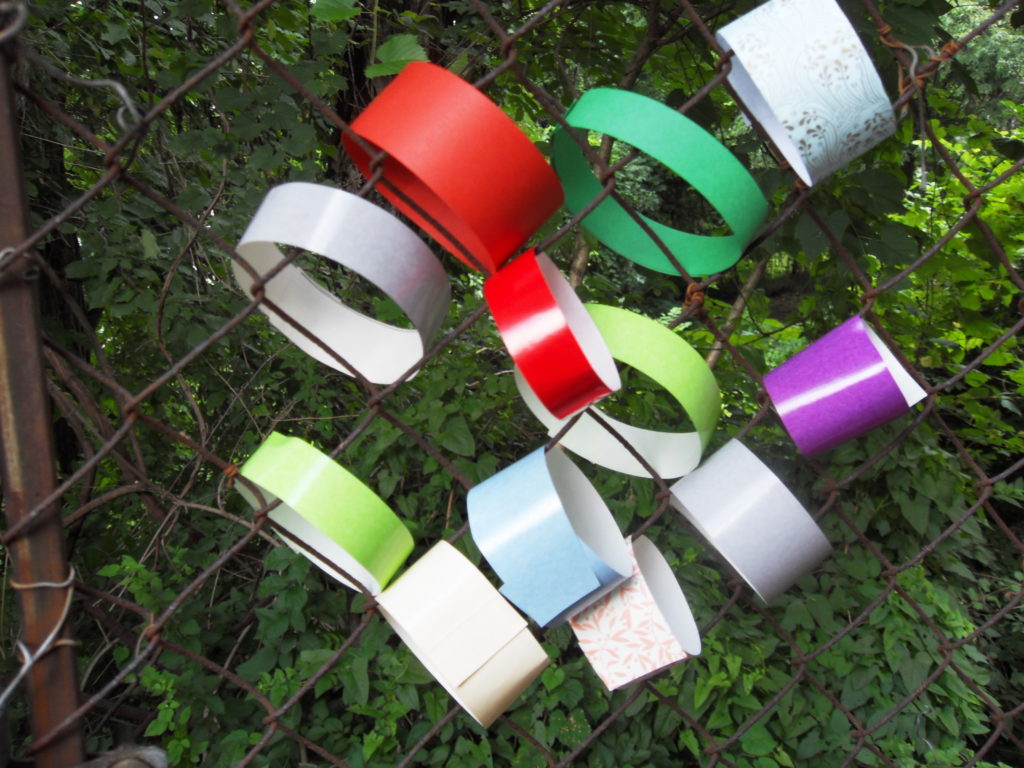
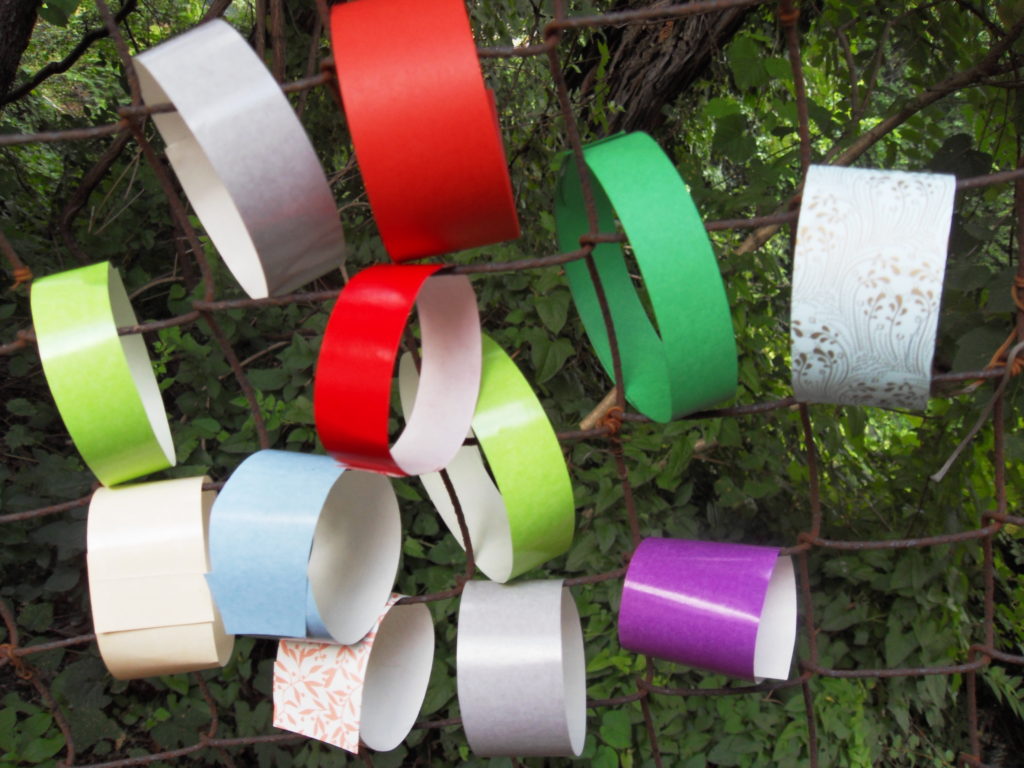
Measure and cut long strips of paper 1″ wide and 4″ long instead of cutting long skinny triangles of paper. Roll up or not too tightly around a pencil and secure with a spot of glue at the tip.

TIP:

Pipe cleaners can be bent to the shapes you desire: circles, ovals, etc. and the pipe cleaner will hold that shape.


Share Button

WEAVING PROJECT: FENCE WEAVING II

WEAVING PROJECT: FENCE WEAVING II

The craft Fence Weaving was adapted from the project “From the Yard/Fence Weaving” found in All-Around-the-House Art and Craft Book by Patricia Z. Wirtenberg and published by Houghton Mifflin Company in1968.

Materials:

One fence preferably a chain link fence

Ribbon, yarn, pipe cleaners, tassels, string, rope, feathers, strips of fabric or paper, and anything else that easily woven through or tied on a chain link fence

Pompoms, beads, tiny shells, paper dessert cups, and anything else  glued to ribbon, yarn, strips of fabric or paper, etc. and attached to the links in the fence. Bits of drawings or photographs can also be used.

Scissors

Glue

1)      Weave, loop or tie materials such as pipe cleaners, ribbon, yarn, rope, strips of fabric or paper and string diagonally, vertically or horizontally through the links in the fence.

2)      Weave or loop or tie the ends of fabric, ribbon or paper through the links in the fence and secured with glue. The more you material you use, the more festive the fence looks.

3)      Glue artificial flowers, beads, tiny shells, and similar items to ribbon, strips of fabric or paper, etc. Weave the ends through the links in the fence.

4)      Make a garland of paper or similar material and attach the ends to the fence. Celebrate the Fourth of July with a red, white and blue garland!

5)      Cut paper letters and/or numbers and glue to a long strip of paper or ribbon and attach to the links in the fence at each end. Anything goes! The signs can say “Happy Summer!”  “Enjoy Summer Camp!” “Hooray for Summer!”

6)      Another idea: decorate the fence according to themes: nature; summer/seashells; art; Disney; cars/trains/airplanes; sports, etc.N

Share Button

WEAVING PROJECTS: FENCE WEAVING I

WEAVING PROJECTS: FENCE WEAVING I

The craft Fence Weaving was adapted from the project “From the Yard/Fence Weaving” found in All-Around-the-House Art and Craft Book by Patricia Z. Wirtenberg and published by Houghton Mifflin Company in 1968.

MATERIALS:

One fence preferably a chain link fence

Ribbon, yarn, pipe cleaners, tassels, string, rope, feathers, strips of fabric or paper, and anything else that easily woven through or tied on a chain link fence

Pompoms, beads, tiny shells, paper dessert cups, and anything else  glued to ribbon, yarn, strips of fabric or paper, etc. and attached to the links in the fence. Bits of drawings or photographs can also be used.

Scissors

Glue

PROJECT:

1)      Weave, loop or tie materials such as pipe cleaners, ribbon, yarn, rope, strips of fabric or paper and string diagonally, vertically or horizontally through the links in the fence.

2)      Weave or loop or tie the ends of fabric, ribbon or paper through the links in the fence and secured with glue. The more you material you use, the more festive the fence looks.

3)      Glue artificial flowers, beads, tiny shells, and similar items to ribbon, strips of fabric or paper, etc. Weave the ends through the links in the fence.

4)      Make a garland of paper or similar material and attach the ends to the fence. Celebrate the Fourth of July with a red, white and blue garland!

5)      Cut paper letters and/or numbers and glue to a long strip of paper or ribbon and attach to the links in the fence at each end. Anything goes! The signs can say “Happy Summer!”  “Enjoy Summer Camp!” “Hooray for Summer!”

6)      Another idea: decorate the fence according to themes: nature; summer/seashells; art; Disney; cars/trains/airplanes; sports, etc.


Share Button

BUGS & THINGS: Lady Bugs

BUGS & THINGS: Lady Bugs
LADY BUG

LADY BUG

LADY BUGS

Lady bugs are bright red with black spots. Their bright red color tells predators to stay away from lady bugs: they smell bad. Their short legs and antennae help them sense the world around them. There are some 5,000 species of ladybugs. Some of them eat plants and all of them eat plant-eating pests.


Materials:

Craft knife

3” Styrofoam ball

2” Styrofoam ball

Red craft paint (or color of choice)

Black craft paint (or color of choice)

Red felt

Black felt

Patterns (provided)

White glue

2 black pipe cleaners

Scissors


Project:

  1. Cut 1/2” from the bottom of a 3” Styrofoam ball. This will enable the lady bug to stand. Cut ¼” from the bottom of the 2” Styrofoam ball.
  2. Paint the Styrofoam ball. Use the traditional red for the body of the lady bug or use a different color. Use your imagination! Paint the 2” head black or use another color.
  3. The patterns provided include a pattern for the wings. Trace the circle on to the red felt and cut. Then cut the circle in half.
  4. There are also patterns for the dots on the lady bug. The dots are usually black but you can use another color for fun. Cut the pattern and trace four dots on the felt. Cut.
  5. Cut the pattern for the stripe down the back. Trace and cut a ¼” x 5” strip of black felt (or color of choice).
  6. Make sure the paint on the Styrofoam ball is dry. Draw a line of glue down the length of the strip and place it along the length the 3” ball.
  7. Place a wing on the 3” ball so it runs along the length of the strip and is even with the top of the strip. Glue only the top edge of the wing to the 3” ball.
  8. Glue the cut end of the 2” ball to the top of the 3’’ ball over the glued ends of the wings.
  9. Cut two 3” lengths of  pipe cleaner and push one end of each stem into the top of the head. Add a little bit of glue to secure the antennae. Bend and shape the ends into little round circles.
  10. Cut a strip of red felt or other color 1 1/2” x 1/8” wide for the mouth. Glue the mouth and the eyes to the face.

.

BIBLIOGRAPHY:

Delano, Marte Ferguson. National Geographic Kids/Butterflies. Washington DC: National Geographic for Kids.

Greensburg, David T. Bugs! NY: Little, Brown and Company. 1997.

Jackson, Demi.  Guess That Animal! Name That Bug! NY: Gareth Stevens Publishing, 2017.

McKissack, Patricia and Frederick. Bugs! Chicago: Children’s Press, 1988.

Parker, Nancy Winslow and Wright, Joan Richards. Bugs. NY: Greenwillow, 1987.

Simon, Seymour. Butterflies. NY: Collins, 2011.

Singer, Marilyn. Caterpillars. Waynesville, MC: Early Light Books, Inc., 2011.

Taylor, Barbara, ed. 1000 Facts on Bugs. NY: Miles Kelly Publishing, 2005.


Share Button

Lazy Day Crafts: Papier Mache Dragon

Lazy Day Crafts: Papier Mache Dragon

Materials:

Newspaper, cut into strips

Scissors

Wall paper paste or white glue slightly thinned

Containers for water and paste

½ egg carton preferably made of paper or cardboard

4 – 6 oz paper cup

Masking tape

Bond or construction paper

Green acrylic or poster paint or any color you choose for your dragon

Glitter, buttons, tissue paper, wiggle eyes, foil, etc

Paint brushes

Paper towels


  1. Cover your work space with newspaper. Cut egg carton in half and tape it shut. Tape the paper cup to one end of the carton. (This will be the head of the dragon.) Make a long tube with the construction paper and tape it to the other end of the carton. (This will be the tail of the dragon.)
  2. Cut newspaper into strips.
  3. Read the directions on the label for using wallpaper paste. Mix wallpaper paste with water and stir. Pour into container.
  4. Dip strips into paste mixture. Allow excess paste to drip off into container. Apply to the dragon mock-up. Apply two or three layers. Allow to dry. Add more layers if needed and apply them when the first three layers are dry. Dry thoroughly.
  5. Paint the dragon with acrylic or poster paint. Allow the paint to dry.
  6. Decorated the papier-mache dragon with a variety of embellishments. Use your imagination!


Share Button

Tissue Paper Flowers

Tissue Paper Flowers


Materials:

Tissue paper in a variety of colors including complimentary colors if you can find them

Scissors

Chenille stems or pipe cleaner

Ruler

Vase or tall empty container

Chop sticks or dowel rods


  1. Stack two pieces of one color tissue paper and two pieces of another color tissue paper.
  2. Make a one-inch fold at the short end. Turn the stack over and make a one-inch fold again. Continue to fold back and forth until the entire stack forms a strip (like an accordion).
  3. Fold the stack in the middle and cut it in half.
  4. Round off the corners of each strip.
  5. Wrap a pipe cleaner around the middle of a strip and twist it tightly.
  6. Fan out the tissue and pull on one layer at strip of papers at a time.
  7. Repeat steps 4 -6 with the second strip.
  8. VARIATION: Using the complimentary colored tissue papers, stack two pieces of blue and two pieces of orange and repeat steps 1 – 7.
  9. Continuing to use complimentary color combinations, stack two pieces of purple and two pieces of yellow tissue paper and follow steps 1 – 7.the chop sticks
  10. Using red and green, stack two pieces of each color and follow steps 1 – 7
  11. When finished making the flowers, attach them to the chop sticks or dowel rods using the pipe cleaners. Put them in a vase or jar and decorate your favorite room.
  12. Attach the various color combination flowers to gifts or the covers of photo albums and journals. Paper flowers have lots of uses!
Share Button