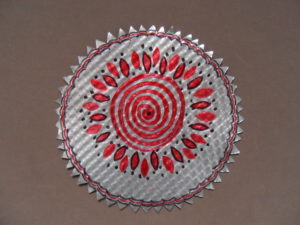
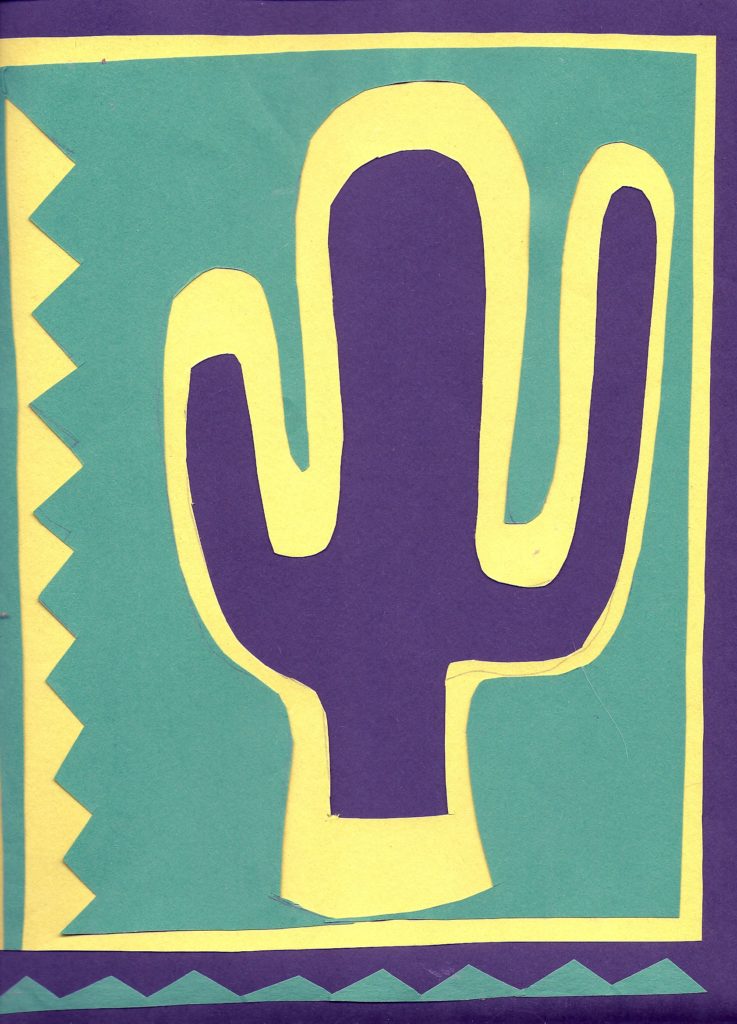
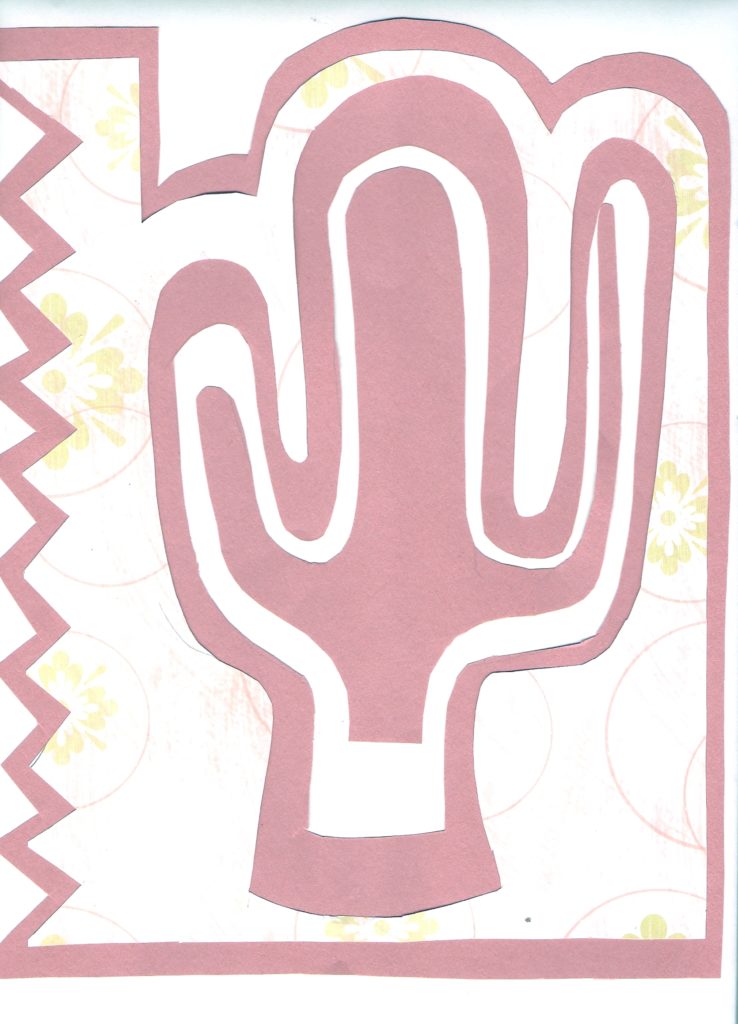
Monthly Archives: July 2019

SUMMER CRAFTS: HOW TO MAKE PAPER MOLAS

SUMMER CRAFTS: HOW TO MAKE PAPER MOLAS

Materials:

Pencil with eraser

Scissors (embroidery scissors work best for cutting out small pieces of paper)

Three pieces of different colored construction paper, memory album paper or craft foam

Glue stick

White glue

Project:

  1. Draw a design on one of the pieces of paper with a pencil. Cut the design out.
  2. Place a second piece of paper under the first. Line up the edges.
  3. Draw smaller design shapes on the second piece of paper.
  4. Pull out the second piece of paper and cut out these smaller shapes.
  5. Place the first piece of paper over the second one and glue them together.
  6. Place these two pieces on top of the third piece of paper and line up the edges.
  7. Glue the third piece into place.
  8. Frame and hang the molas.
Share Button

SUMMER CRAFTS: MEXICAN “BARK” PAINTINGS

SUMMER CRAFTS: MEXICAN “BARK” PAINTINGS
MEXICAN "BARK" PAINTING

MEXICAN “BARK” PAINTING


MEXICAN “BARK” PAINTING

Latin American bark paintings depict birds, fish, sea horses, alpaca, armadillo, and flowers like marigolds, roses, hibiscus and sunflowers. Consider combinations of these objects when creating your design for the bark painting.(See below for a photo of an authentic banana bark painting.)

MATERIALS:

White drawing paper

Tracing paper

Pencil

Permanent black fine-line felt-tipped marker

Acrylic paints – bright colors of choice

Paint brushes

Shellac

Large paint brush

1/4 inch thick piece of plywood 8” x 10”

PROJECT:

  1. Draw your design on a piece of white paper. Then place the tracing paper on the drawing. Trace your design on to the tracing paper.
  2. Blacken the back side of the tracing paper and place it blackened side down on the plywood. Tape it down.
  3. Go over the design on the tracing paper with a pencil by pressing down hard. Remove the tracing paper and go over the lines on the plywood with the black marker. (They should show up on the plywood. Take a peek under one corner of the papers first to see if an impression was made.)
  4. Color the designs with the paints. Make it colorful like real Mexican bark paintings. Allow to dry.
  5. Layer a coat of shellac over the painting to make it shine and to protect it. Mexican bark paintings are colorful. Hang it up in a prominent place.

Mexican Banana Bark Painting

MEXICAN BANANA BARK PAINTING

Share Button

SUMMER CRAFTS: OJO DE DIOS (GOD’S EYE)

SUMMER CRAFTS: OJO DE DIOS (GOD’S EYE)

OJO DE DIOS (GOD’S EYE)

What is an Ojo de Dios? The indigenous peoples of the Americas originally used them as an object of worship. Today the Ojo de Dios or Eye of God is also used as a decoration.

OJO DE DIOS (GOD'S EYE)

OJO DE DIOS (GOD’S EYE)

Materials:

Chop sticks or dowel rods (12” in length)

Yarn in assorted colors

Scissors

White glue

  1. Cross the chopsticks or dowel rod in the center. Pick a color for the center of the God’s Eye. Tie securely with the end of the yarn.
  2. Loop the yarn a couple of times to secure it further.
  3. Holding the center of the sticks, wrap the yarn under and around one of the sticks a few times. Make sure the sticks don’t show by pushing the yarn together on the stick. Pull snugly.
  4. Pull the yarn to the next stick. Wrap it under and around.
  5. Continue to wrap the yarn from stick to stick by wrapping under the sticks.
  6. If you choose to change colors, tie the yarn to a stick and cut off the excess. Tie on a second yarn.
  7. Continue to wrap until the sticks are almost covered. Make the final wrap and tie the yarn to the stick. You will need extra yarn so cut this piece about 5 “– 6” from the knot.
  8. Place a small amount of glue on the end of the stick. Wrap the end of the yarn over the glue, covering the entire end of the stick. Snip any excess yarn.
  9. Make a loop. Tie it to the opposite end of the stick and hang.

TIP: Small God’s Eyes make great Christmas tree and/or window ornaments. Pencils or short thin dowel rods can be used to make smaller Ojo de Dios ornaments.

Share Button

SUMMER CRAFTS: AZTEC SUN

SUMMER CRAFTS: AZTEC SUN
Aztec Sun

Aztec Sun

Materials:

Two bowls (or plates or other round object)

Ruler

Yellow craft foam

Pencil

Scissors

Tissue paper in four different colors

Wax paper

Mod Podge

Foam brush

Puffy paint

Glue

Hole punch

String


Project:

  1. Center a large bowl upside down on the yellow craft foam.
  2. Draw triangles all around the bowl with a pencil indicating the sun’s rays.
  3. Remove the large bowl and place the small bowl upside down and in the center of the sun. Trace.
  4. Cut outside of the sun. Fold it in half and make a small cut in the middle. Unfold it and cut from the middle to the circle. Cut around the circle.
  5. Cut the tissue paper into small pieces. Vary the size, shape or color; variety is more interesting than uniformity.
  6. Cut a piece of wax paper larger than the sun. Squeeze some Mod Podge on the wax paper and spread it over an area larger than the sun with the foam brush.
  7. Lay the pieces of tissue paper on the Mod Podge, overlapping them. Cover the Mod Podge completely.
  8. Brush Mod Podge over the tissue paper with the foam brush and allow it to dry thoroughly.
  9. Decorate the sun and its rays with puffy paint, glitter glue and sequins. Allow to dry.
  10. Place the large bowl on top of the tissue paper and trace it. Cut around the circle, removing excess tissue.
  11. Put a thin line of glue around the edge of the circle. Place the sun over the glue and press. Weigh the sun down with heavy objects until the glue dries.
  12. Punch a hole in one of the rays and pull a string through it. Tie a knot and hang up.
Share Button

SUMMER CRAFTS: HOJALOTA

SUMMER CRAFTS: HOJALOTA

What is hojalata? A hojalata is Mexican tin art used to create ornate and often practical objects like boxes or hangings or candelabras and more.


HOJALOTA

HOJALOTA


Materials:

Disposable round aluminum pan

Paper

Permanent markers (Optional: use paints specifically for metal, brushes and a water container)

Scissors

Newspaper

Puncher to make holes

Jump rings

String


Project:

  1. Cover the work table. Place the disposable aluminum pan on a piece of colored paper and trace the bottom of the pan so you have a circle.
  2. Sketch a design on a piece of paper: the sun, flowers, cactus, birds, the moon, an animal, etc. (Traditionally, humorous or religious or cultural objects are drawn by hojalata artists.) Then draw the design in the circle using a black marker. Cut out the circle and the bottom of the aluminum pan.
  3. Lay the drawing on the aluminum pie pan circle. Pushing hard enough to mark the metal, trace the design with a sharp pencil or similar tool.
  4. Turn the aluminum pie pan circle over and color in the design with permanent markers.
  5. Punch a hole at the top of the pie pan circle, pull a piece of string through and hang the hojalata.
  6. If you make more than one, you can string them by punching a hole at the top and bottom of each and connecting them with jump rings.
  7. Loop a piece of string through the hole of the top hojalata and hang. If you hang the hojalatas outdoors, watch them shine in the sum or blow in the wind!


Share Button