Tag Archives: scissors

SUMMER CRAFTS: HOW TO MAKE PAPER MOLAS

SUMMER CRAFTS: HOW TO MAKE PAPER MOLAS

Materials:

Pencil with eraser

Scissors (embroidery scissors work best for cutting out small pieces of paper)

Three pieces of different colored construction paper, memory album paper or craft foam

Glue stick

White glue

Project:

  1. Draw a design on one of the pieces of paper with a pencil. Cut the design out.
  2. Place a second piece of paper under the first. Line up the edges.
  3. Draw smaller design shapes on the second piece of paper.
  4. Pull out the second piece of paper and cut out these smaller shapes.
  5. Place the first piece of paper over the second one and glue them together.
  6. Place these two pieces on top of the third piece of paper and line up the edges.
  7. Glue the third piece into place.
  8. Frame and hang the molas.
Share Button

ART PROJECT FOR KIDS: Paper Weaving.

ART PROJECT FOR KIDS: Paper Weaving.


The craft PAPER WEAVING was adapted from the project “Stitches, Scraps and Haute Couture/Paper Weaving” published in Arts and Crafts Activities Desk Book by Joyce Novis Laskin and published by Parker Publishing Company in 1971.

MATERIALS:

Large sheet of thick paper or cardboard for the frame of the mock loom

Two or three different colored and/or pattered papers cut into strips

Ribbon (optional)

Scissors

Ruler

Pencil with eraser

Glue stick or scotch tape

  1. Fold paper in half. (Choose any size paper or cardboard from 8 ½” x 11” and up.) Draw lines ¼” to ¾” apart down the length of the fold.
  2. Look at Step II below. Make incisions with the scissors, starting from the fold up to ½” of the edges of the paper. Don’t cut all the way to the end or you will cut the paper/cardboard into strips! Cut up to ½”  at each the end of the paper/cardboard and draw a line across. (In other words, leave an uncut margin at both ends.) This is the weaving “frame” or “loom.” Open the paper or cardboard.
  3. Measure and cut strips of paper to weave in and out of the paper loom. To minimize mistakes, make sure that the strips are a little longer than the width of the loom.
  4. Choose two or three different colored papers to weave through the paper loom. (Alternate ribbon with paper for a different look to the weaving.)  Start at one end and work your way up to the other end. Alternate the in-and-out pattern with each row. (Refer to photograph.)
  5. Trim loose ends and glue the ends down using a glue stick.
  6. Use your paper weaving as a place mats or give it as a gift.  What else can you do with your paper weavings?
Share Button

CROSS STITCHING FUN – SIMPLE WAYS TO GET STARTED

CROSS STITCHING FUN – SIMPLE WAYS TO GET STARTED
Cross Stitch sample

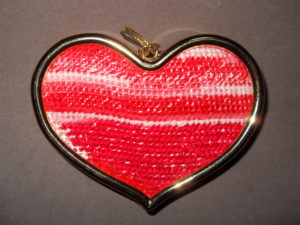
Cross Stitch sample: Hanging Ornament


Cross stitching is a fun way to pass the time and relax. There are several different ways to get started. Whether you decide to buy a cross stitching kit or buy the supplies separately, it is easy to get started.

Start out by making a visit to your local craft store. Many craft stores carry both the premade kits and the separate supplies. Premade kits come in handy because they include the thread, the canvas and the needle as well as step by step instructions. The premade kits come in different styles and projects. Pictures are available as well as more detailed projects such as pillow cases, bibs, blankets and lots more. Prices for the premade kits are wide in range. There are several projects that start as low as $5 ranging up to $100 for more detailed projects.

If you choose to buy the supplies separately, it is a good idea to buy a cross stitch book first. These books usually contain several patterns and specify the materials needed to complete the patterns. Among the materials needed are typically thread, needles, canvas and a hoop to keep the canvas stretched. The hoop makes it easy to cross stitch more accurately, but they are not required.

Follow the directions included in the kit or patterns to achieve the desired outcome. The directions supplied specify the colors used and each has a specific icon that represents the color. Follow these directions to make sure that your picture matches the pattern. There are several different kinds of stitches such as cross stitch, half-stitch and a back-stitch. Each stitch made a certain way, so familiarize yourself with each stitch. Knowing the stitches beforehand will help end any frustration during the sewing.

After you have experience with cross stitching it is possible to develop your own pattern. Do some research and choose a picture to turn into a cross stitch pattern. This is a more complex way of cross stitching so ease and experience count.

After the cross stitch is complete, it is time to frame your work! Buy a nice frame to display your work on the wall or to give away as a gift. Congratulate yourself on a job well done.

Getting started with cross stitch is easy and fun. There are two different methods to get started, buy a premade kit or buy the supplies separately. Craft stores usually carry all the supplies you need to get started, so be sure to visit one and pick the best method for you.

Share Button