Monthly Archives: November 2015

Tissue Paper Flowers

Tissue Paper Flowers


Materials:

Tissue paper in a variety of colors including complimentary colors if you can find them

Scissors

Chenille stems or pipe cleaner

Ruler

Vase or tall empty container

Chop sticks or dowel rods


  1. Stack two pieces of one color tissue paper and two pieces of another color tissue paper.
  2. Make a one-inch fold at the short end. Turn the stack over and make a one-inch fold again. Continue to fold back and forth until the entire stack forms a strip (like an accordion).
  3. Fold the stack in the middle and cut it in half.
  4. Round off the corners of each strip.
  5. Wrap a pipe cleaner around the middle of a strip and twist it tightly.
  6. Fan out the tissue and pull on one layer at strip of papers at a time.
  7. Repeat steps 4 -6 with the second strip.
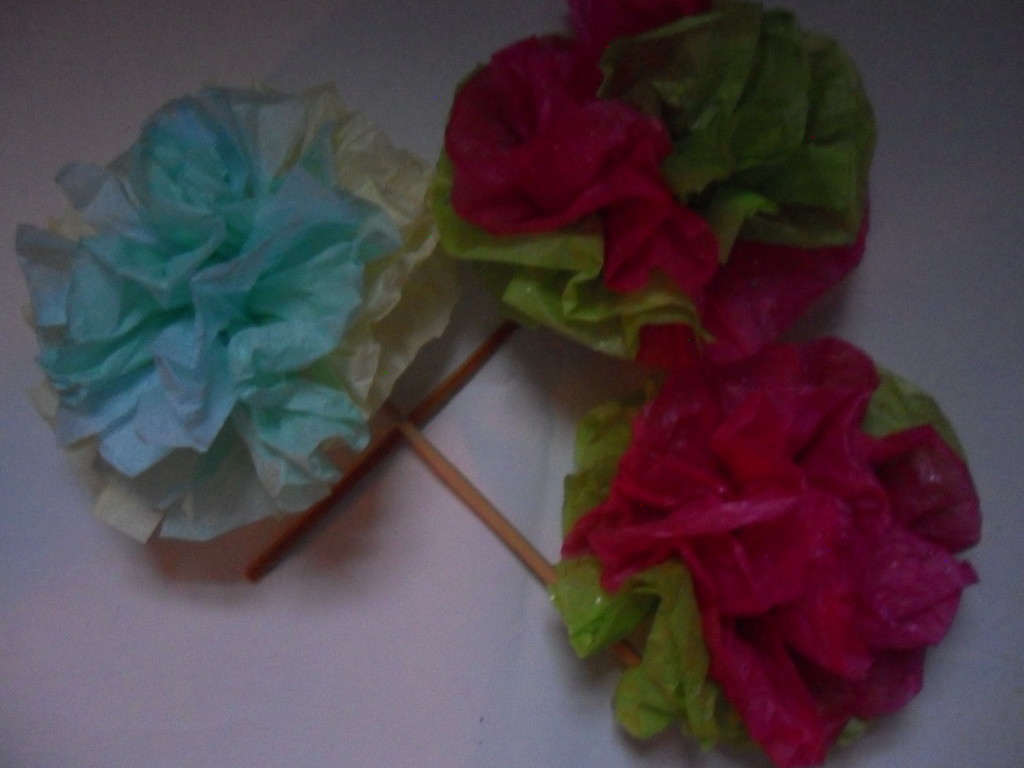
  8. VARIATION: Using the complimentary colored tissue papers, stack two pieces of blue and two pieces of orange and repeat steps 1 – 7.
  9. Continuing to use complimentary color combinations, stack two pieces of purple and two pieces of yellow tissue paper and follow steps 1 – 7.the chop sticks
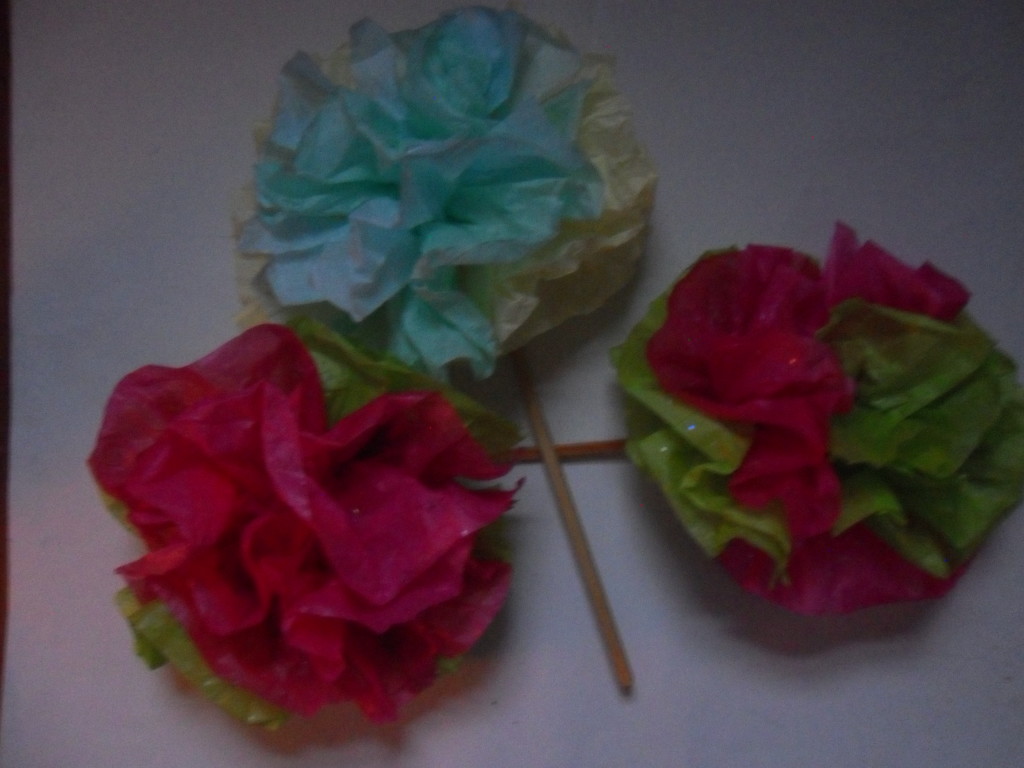
  10. Using red and green, stack two pieces of each color and follow steps 1 – 7
  11. When finished making the flowers, attach them to the chop sticks or dowel rods using the pipe cleaners. Put them in a vase or jar and decorate your favorite room.
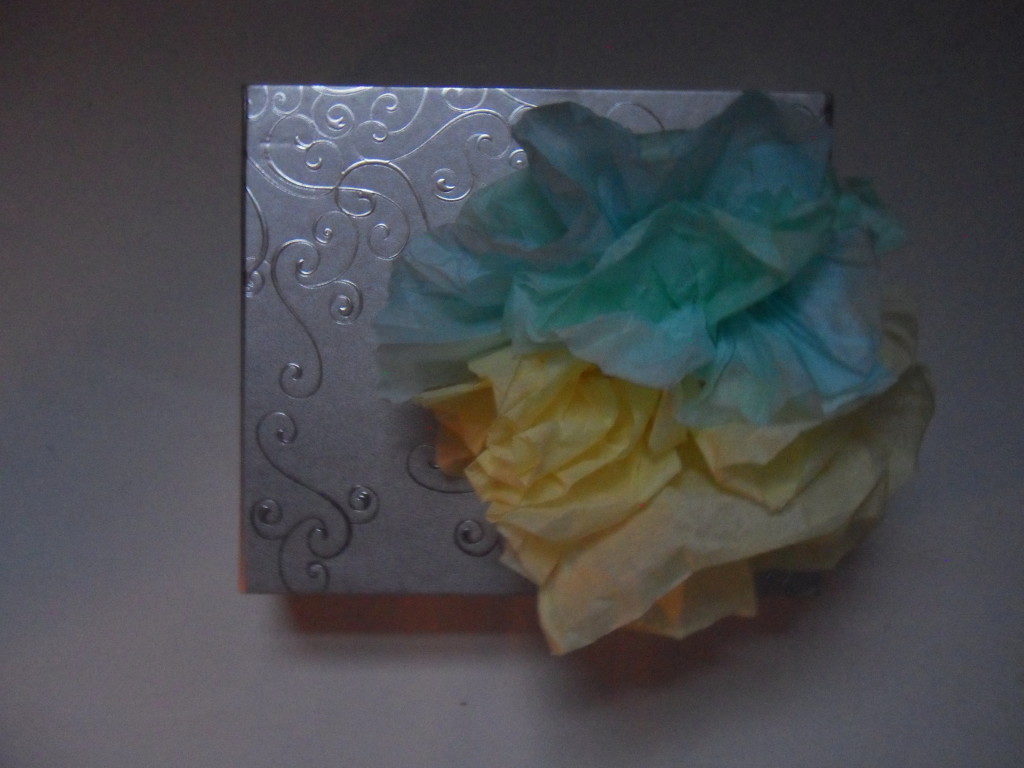
  12. Attach the various color combination flowers to gifts or the covers of photo albums and journals. Paper flowers have lots of uses!
Share Button

Ojo de Dios (God’s Eye)

Ojo de Dios (God’s Eye)
GOD'S EYE

                                    GOD’S EYE

Materials:

Chop sticks or dowel rods (12” in length)

Yarn in assorted colors

Scissors

White glue

  1. Cross the chopsticks or dowel rod in the center. Pick a color for the center of the God’s Eye. Tie securely with the end of the yarn.
  2. Loop the yarn a couple of times to secure it further.
  3. Holding the center of the sticks, wrap the yarn under and around one of the sticks a few times. Make sure the sticks don’t show by pushing the yarn together on the stick. Pull snugly.
  4. Pull the yarn to the next stick. Wrap it under and around.
  5. Continue to wrap the yarn from stick to stick by wrapping under the sticks.
  6. If you choose to change colors, tie the yarn to a stick and cut off the excess. Tie on a second yarn.
  7. Continue to wrap until the sticks are almost covered. Make the last wrap and tie the yarn to the stick. You will need extra yarn so cut this piece about 5 “– 6” from the knot.
  8. Place a small amount of glue on the end of the stick. Wrap the end of the yarn over the glue, covering the entire end of the stick. Snip any excess yarn.
  9. Make two small God’s Eyes to hang on either horizontal end of the larger God’s Eye. Use pencils or narrower dowel rods and wrap the yarn like you did in Steps 2 through 8.
  10. Make a loop. Tie it to the opposite vertical end of the stick and hang.

TIP: Small God’s Eyes make great Christmas tree and/or window ornaments. Use pencils to make these smaller Ojo de Dios.

Share Button

Maracas

Maracas
MARACAS

MARACAS

Materials:

Newspaper cut into 1 inch wide strips

7” x 12” heavy paper (i.e., oak tag)

Masking tape

Rice or beans

White glue

Self-adhesive decorative contact paper

Empty toilet paper rolls

Scissors

Bowl of water

Various paints and brushes

Balloon


  1. To make the handle of the maracas: cut out a 7” x 12” piece of heavy paper like oak tag. Make a fringe along the top edge by cutting 1” slits every ¼.”
  2. Roll the paper into a tube shape and tape along the edge. Gather the fringe at the one end of the tube. Set aside.
  3. Or skip steps #1 and #2 and use an empty toilet roll.
  4. Blow up a balloon.
  5. Cut the strips of newspaper into one-inch wide strips.
  6. Mix the white glue and water so it is the consistency of pancake batter. Stir. Dip the strips into the glue/water mixture. Remove the excess with your fingers. Cover the entire balloon with these strips.
  7. Smooth the paper on the balloon with your hands removing all excess glue/water. Let the balloon dry completely. Take a pin, poke the surface and pop the balloon.
  8. Make a small opening in the balloon with a utility knife and pour a handful of rice or s into the opening. Seal with tape.
  9. If you are using the fringed paper, spread the fringe on the papier mache ball and tape down. Or if you are using the toilet paper ball and tape securely against the balloon.
  10. Wrap the tube with decorative contact paper or decorative tape or paint it.
  11. Paint the papier mache balloon. When dry, add sequins, glitter, etc. Refer to the examples above.
  12. Have making music!
Share Button