Monthly Archives: June 2014

Our Imaginations! Camp for Kids: Paper Weaving

Our Imaginations! Camp for Kids: Paper Weaving

The craft PAPER WEAVING was adapted from the  project “Stitches, Scraps and Haute Couture/Paper Weaving” found  in Arts and Crafts Activities Desk Book by Joyce Novis Laskin and published by Parker Publishing Company in 1971.

MATERIALS:

Large sheet of thick paper or cardboard for the frame of the mock loom

Two or three different colored and/or pattered papers cut into strips

Ribbon (optional)

Scissors

Ruler

Pencil with eraser

Glue stick or scotch tape

  1. Fold paper in half. (Choose any size paper or cardboard from 8 ½” x 11” and up.) Draw lines ¼” to ¾” apart down the length of the fold.
  2. Look at Step II below. Make incisions with the scissors, starting from the fold up to ½” of the edges of the paper. Don’t cut all the way to the end or you will cut the paper/cardboard into strips! Cut up to ½”  at each the end of the paper/cardboard and draw a line across. (In other words, leave an uncut margin at both ends.) This is the weaving “frame” or “loom.” Open the paper or cardboard.
  3. Measure and cut strips of paper to weave in and out of the paper loom. To minimize mistakes, make sure that the strips are a little longer than the width of the loom.
  4. Choose two or three different colored papers to weave through the paper loom. (Alternate ribbon with paper for a different look to the weaving.)  Start at one end and work your way up to the other end. Alternate the in-and-out pattern with each row. (Refer to photograph.)
  5. Trim loose ends and glue the ends down using a glue stick.
  6. Use your paper weaving as a placemats or give it as a gift.  What else can you do with your paper weaving?
Paper Weaving Step I

Paper Weaving Step I

Paper Weaving Step II

Paper Weaving Step II

Paper Weaving Step III

Paper Weaving Step III


Paper Weaving Part IV

Paper Weaving Part IV


Share Button

Our Imaginations! Camp for Kids: Nature Collage

Our Imaginations! Camp for Kids: Nature Collage

The craft NATURE COLLAGE was adapted from the project “World of Nature/Spring Mural Collage” found in the Arts and Crafts Activities Desk Book by Joyce Novis Laskin and published by Parker Publishing Company in 1971.

MATERIALS:

White glue or glue stick

cardboard any size

Scissors

Any combination of: poster or acrylic paints, brushes, fabric scraps, newspapers, magazines, photos, pen and ink, crayons, construction paper, tissue paper, brown paper bags, ribbon, buttons, etc.

Objects from nature: leaves, twigs, bark, shells, pebbles, seeds from plants, etc.

1. A collage is a composition or picture made by attaching different found objects and materials to a surface. That surface is often (but not always) flat. Like all forms of art, the first step in making a collage involves thinking. What will the collage be about?

2. Decide the size of the collage. Glue, draw or paint everything on the cardboard so it is important to decide if you want a large or a small collage. Use a large sheet or cut it in half.

3. Next, decide if you want the design to flow across the cardboard (horizontally), from the top to the bottom (vertically) or from corner to corner (diagonally).To create depth, larger objects should stand in front of smaller ones. It is smart to work from the back to the front of the collage so glue the smaller objects first. This gives the person looking at the collage a feeling of depth. “Depth” means that you can see objects in back of the objects that are in front of the scene that you are creating.

4. Collect the materials that you will be using. Different materials make up a collage.  This collage project has one main subject (nature) so collect many objects from and about nature. Photographs, drawings of objects from nature (the sun, butterflies, bees, birds, clouds, etc.) can also be used.

Use cut paper, too. Cut the paper into different shapes suggesting nature (i.e., leaves and flowers) using scissors. This will produce paper edges that are wavy, zigzagged or straight.

Or fold the paper once. Turn the paper on the other side and fold again in the other direction. Tear the paper along the fold. Continue to fold and tear the paper into shapes. This creates ragged paper edges which will look different from the papers cut with scissors.

Glue the papers down and overlap them. The layers of tissue paper will show the color and shape of the paper or board underneath and create pretty designs.

5. Glue the materials to the cardboard. If you are not sure about the design, glue them to a piece of paper like construction paper. Then, decide if the materials can be added to the collage. If you decide that you can, glue the paper with the objects to the cardboard.

6. Frame the collage and hang on your bedroom wall!

VARIATION:

SEASHELLS: Find a couple of seashells. The kinds that are sort of flat are the best for this idea. Choose two or three colors of paint and squeeze some on a palette or piece of wax paper. Brush the paint on one side of the shell. Experiment with the amount of paint. Print the shell on a piece of construction paper by rolling it and pressing. Do this with the other colors and shells, occasionally overlapping some of the shells to create a pattern. To add another dimension to the shells, glue tiny seeds or pebbles on the ends of the printed shells. When the paint is dry, cut the printed shells and glue to the cardboard along with the other objects collected. (See the Summer Camp for Kids: Nature Prints tutorial on this website for more information.)

The collage below includes a drawing of a flower, a sun print of leaves and twigs, a part of a nature print of leaves and rubber stamped leaves. Assorted cut paper was used for the background.


Nature Collage

Nature Collage


Share Button

What Events Happened in 1971?

What Events Happened in 1971?

1971 Fun Facts

From:

www.thepeoplehistory.com

http://en.wikipedia.org

www.historyproject.org

Fashions:

What was popular to wear in 1971? Did the cost of clothing rise from 1968?

Shorts; tunic over pants

Two-tone dresses

Fake fur coats

Velveteen boots

Slip-ons (flats)

Bird Cage umbrella

Crocheted shawls

Double strap bag

Zipper on side of boots for men

Tyrolean-style hat for men

Striped shirts and turtlenecks for men

Shift dresses with focus seams

Maxi-dresses

Halter necklines

Trouser suits

Flared skirts

Wide sleeves

Platform shoes

Hair:

Long hair

Natural look

Feathered hair like Farah Fawcett

Afro

Miscellaneous: Toys for children

Barbie and accessories

Etch-a-Sketch

Scooter

Hot Wheels Cars

Operation

Movies:

Love Story

Summer of ‘42

Ryan’s Daughter

Carnal Knowledge

The Owl and the Pussycat

The Aristocrats

The French Connection

The Andromeda Stain

Television Shows:

That Girl

All My Children

The Odd Couple

The Partridge Family

McCloud

The Mary Tyler Moore Show

Songs:

Imagine – John Lennon

Just My Imagination – Temptations

Brown Sugar – Rolling Stones

Maggie May – Rod Stewart

American Pie – Don McLean

Stairway to Heaven – Led Zeppelin

Books:

The Lorax – Dr. Suess

The Day of the Jackall – Frederick Forsythe

The Exorcist – William Peter Blatty

Stone Soup – Ann McGovern

Broadway:

Jesus Christ Superstar

You’re a Good Man, Charlie Brown

No, No, Nanette

Events:

Richard Nixon was the 37th President of the US and Spiro Agnew was 39th Vice-President of the US

What happened to President Nixon and Vice-President Agnew after 1971?

Voting age lowered to 18 in the US

The microprocessor was invented

North Sea Oil Production in Norway

China was admitted to the UN

NASDAQ debuts

What is NASDAQ and what other organization is similar?

Border conflicts between Pakistan and India over E. Pakistan (Bangladesh)

Women were granted the right to vote in Switzerland

Federal Express was started

World population increased by 21%

Civilian government takes power in Greece

England and Ireland switch to the decimal system

Greenpeace is born

Walt Disney Resort opens in Florida

Sports:

Super Bowl V is won by the Baltimore Colts 16-13 vs. the Dallas Cowboys

Pittsburgh Pirates win the World Series 4 games to 3 vs. the Baltimore Colts

Joe Frazier defeats Muhammad Ali at Madison Square Garden to retain the World     Heavyweight Championship

Stanley Cup is won by the Montreal Canadiens 4 games to 3 vs. the Chicago Blackhawks

Canonero II wins the Kentucky Derby and the Preakness Stakes but falls short of winning the Triple Crown

Can you find out who did win the Triple Crown and when?


Betty Crocker’s Peach Pie recipe from 1971:

Ingredients:

Crust:

1 cup Gold Medal all-purpose flour

½ tsp. salt

1/3 cup plus 1 shortening

2 – 3 Tbsp.. cold water

Filling:

4 cups quartered, peeled peaches (8 – 10 medium)

½ cup granulated sugar

½ tsp. ground nutmeg

2 Tbsp.. whipping cram

1 egg

Topping:

½ cup Gold Medal all-purpose flour

¼ cups packed brown sugar

¼ tsp. ground cinnamon

¼ tsp. ground nutmeg

¼ cup butter or margarine, softened

Directions:

  1. In medium bowl, mix 1 cup flour and the salt. Cut in shortening, using pastry blender (or pulling 2 table knives through ingredients in opposite directions), until particle are the size of small peas. Sprinkle cold water, 1 tablespoon at a time, tossing with fork until all flour is moistened and pastry almost cleans side of bowl (1 to 2 teaspoons more water can be added if necessary).
  2. Gather pastry into a ball. On lightly floured surface, shape pastry into a flattened disk. Wrap in plastic wrap; refrigerate about 45 minutes or until dough is firm and cold yet pliable. (If refrigerated longer, let dough soften slightly before rolling.)
  3. Heat oven to 425 degrees F. On lightly floured surface, roll pastry with a floured rolling-pin into round 2 inches larger than upside-down 9 inch glass pie plate. Fold pastry into quarters, place in pie plate. Unfold and ease into plate, pressing firmly against bottom and side. Trim overhanging edge of pastry ` inch from rim of plate. Fold and roll pastry under, even with plate; press edge with tines of fork or flute if desired.
  4. Place peaches in pastry-lined plate. Mix granulated sugar and ½ teaspoon nutmeg; sprinkle over peaches. In small bowl, beat whipping cram and egg with fork or wire whisk until blended; pour over peaches. In another small bowl, mix topping ingredients with fork until crumbly; sprinkle over peaches.
  5. Cover edge of pastry with 2 to 3 inch-wide strip of foil to prevent excessive browning; remove foil for last 15 minutes of baking. Bake 35 to 40 minutes or until top is golden brown. Cool 30 minutes. Serve warm.


Share Button

Color the Flowers

Color the Flowers
Color the Flowers

Flowers

Materials:

drawing pencils

watercolors

pastels

colored craft paper

scissors

glue

Print and color the flowers. Color the background, too. Use texture and patterns in the background and on  the flowers. Cut them out and paste them in an album or frame them and hang them on your bedroom wall.

Share Button

Kid’s Crafts: Red, White and Blue Banner

Kid’s Crafts: Red, White and Blue Banner

RED WHITE AND BLUE BANNER

Fourth of July Banner

Red, White and Blue Banner

Ages: 5 – 12 years

Time: one hour

MATERIALS:

White felt 14” x 18”

Red, white, blue craft foam sheets

Sharp tool like an awl

¼” red, white and blue ribbon

Dowel rod 18”

String – double the length of the dowel rod

Measure and cut white felt to 14” x 20”. Place felt horizontally. Make a loop by measuring and folding and ironing a 1” seam. Measure and fold a second 1” seam. Iron and glue the second fold. You will be inserting the dowel rod through this loop. (This piece of felt should now measure  14” x 16”.)

Using templates or stencils trace the large star pattern and cut one large star out of the white craft foam sheet. Cut 13 smaller stars out of the white craft foam using the smaller star pattern. Trace and cut a large circle out of the blue craft foam sheet. Glue the large star in the center. Arrange the smaller stars around the circle. Make sure that they all face the same way. Lay aside.

Measure and cut 7 stripes ¾” x 16” out of the red craft foam sheet. Arrange the stripes on the banner so that there is a ¾” stripe of white felt showing between them. (Refer to the photo of the banner.) Glue the stripes down and trim if necessary.

Glue the blue circle with the stars in the center of the red and white stripes.

At the bottom of the banner, poke holes every 1” with a sharp tool like an awl. (Small children should let adults do this for them.) Insert the ribbon in the holes, alternating the colors. Pull the ribbon through and tie a knot in the back.

Trim the dowel rod to 18”. Cut a piece of string to a length suitable for hanging. Tie the string to each end of the dowel rod. The first Fourth of July celebration occurred in Philadelphia, PA. Eventually, all the states celebrated the holiday which included parades, picnics, military displays and fireworks.

VARIATION: You can also hang your banner on Memorial Day or Labor Day!


Share Button

Our Imaginations! Camp for Kids: Fence Weaving

Our Imaginations! Camp for Kids: Fence Weaving

The craft Fence Weaving was adapted from the project “From the Yard/Fence Weaving” found in All-Around-the-House Art and Craft Book by Patricia Z. Wirtenberg and published by Houghton Mifflin Company in1968.

Materials:

One fence preferably a chain link fence

Ribbon, yarn, pipe cleaners, tassels, string, rope, feathers, strips of fabric or paper, and anything else that easily woven through or tied on a chain link fence

Pompoms, beads, tiny shells, paper dessert cups, and anything else  glued to ribbon, yarn, strips of fabric or paper, etc. and attached to the links in the fence. Bits of drawings or photographs can also be used.

Scissors

Glue

1)      Weave, loop or tie materials such as pipe cleaners, ribbon, yarn, rope, strips of fabric or paper and string diagonally, vertically or horizontally through the links in the fence.

2)      Weave or loop or tie the ends of fabric, ribbon or paper through the links in the fence and secured with glue. The more you material you use, the more festive the fence looks.

3)      Glue artificial flowers, beads, tiny shells, and similar items to ribbon, strips of fabric or paper, etc. Weave the ends through the links in the fence.

4)      Make a garland of paper or similar material and attach the ends to the fence. Celebrate the Fourth of July with a red, white and blue garland!

5)      Cut paper letters and/or numbers and glue to a long strip of paper or ribbon and attach to the links in the fence at each end. Anything goes! The signs can say “Happy Summer!”  “Enjoy Summer Camp!” “Hooray for Summer!”

6)      Another idea: decorate the fence according to themes: nature; summer/seashells; art; Disney; cars/trains/airplanes; sports, etc.

Fence Weaving Nature Theme

Fence Weaving Nature Theme

Fence Weaving

Fence Weaving

Share Button

What Events Happened in 1968?

What Events Happened in 1968?

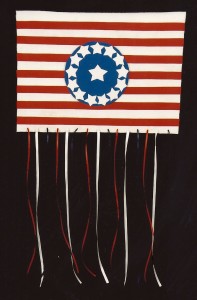
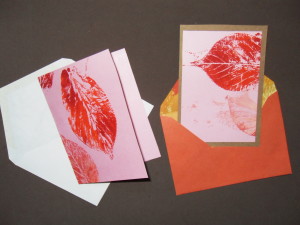
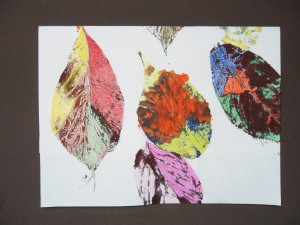
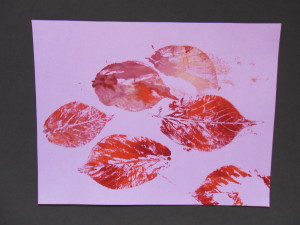
After you’ve finished your project, Nature Prints, read the Fun Facts below:

1968: Fun Facts

From:

www.thepeoplehistory.com

http://en.wikipedia.org

www.historyproject.org

Find out the prices for consumer goods for the year 1968 by clicking on the links provided above.

Fashion:

What was popular to wear in 1968? How much did clothing cost?

The androgynous hippie look (frayed bell-bottom jeans; sandals; work shirts; headbands; tie-dyed T-shirts; going barefoot and sometimes braless)

Fringed buckskin vests

Flowing caftans

Lounging pajamas which consisted of tunic-top over floor-length culottes made of polyester or chiffon

Mini-skirts with a French polo-neck top

Square-toed boots

Newsboy cap or beret

Long maxi coats often belted

Women’s shirts with transparent sleeves

Psychedelic prints.


Hair:

How much did a hair cut cost?

Mop-tops like the Beatles

Long hair including beehives

Short hair like Twiggy

Men wore mustaches, goatees, beards and sideburns.


Miscellaneous: Fashion, Consumer and Cultural Trends

Hosiery

Tights

Jeans

Ponchos

Love beads

The peace sign

Medallion necklaces

Moccasins

Chain belts

Polka-dot printed fabric

Long puff or bubble sleeves

Polyester materials

Go-go boots

Andy Warhol and Pop Art

Apple Records was formed

The White Album is released

60 Minutes airs for the first time on CBS


Popular Films:

How much did a movie ticket cost?

2001 Space Odyssey

Planet of the Apes

Funny Girl

Rosemary’s Baby

The Lion in Winter

Oliver!

Romeo and Juliet


Broadway:

Hair


Television Shows:

How much did a black and white TV set cost?

Here’s Lucy

Star Trek

Julia

The Lawrence Welk Show

The Doris Day Show

Hawaii Five-O


Songs:

Hey Jude – Beatles

(Sittin’ On) The Dock of the Bay – Otis Redding

Honey – Bobby Goldsboro

Stoned Soul Picnic – Fifth Dimension

Mrs. Robinson – Simon and Garfunkle


Books:

Myra Breckenridge by Gore Vidal

In the Heart of the Heart of the Country by William H. Glass


Sports:

Green Bay (vs. Oakland) won the Super bowl

Detroit (vs. St. Louis) won the World Series

Montreal Canadiens (vs. St. Louis) won the Stanley Cup

Billy Jean King won the women’s and Rod Laver won the men’s competition at Wimbledon

Forward pass won the Kentucky Derby

UCLA (vs. North Carolina) won the NCAA trophy

Ohio State won the NCAA title in football

Manchester United won the European Cup


Headline News:

Lyndon B. Johnson was the 36th President of the US and Hubert Humphrey was the 38th Vice-President of the US

Viet Nam war escalates; American opinion turns against US participation in the conflict

The anti-draft movement gained momentum as a result of the war

Martin Luther King, civil rights leader, is assassinated on April 4th

Robert F. Kennedy, presidential candidate, was assassinated on June 5, 1968

Richard Nixon was nominated for President at the Republican National Convention held in August

Hubert Humphrey was nominated for President at the Democratic National Convention also held in August

In September, Women’s Liberation groups, including the National Organization for Women, protested the Miss America Beauty Contest in Atlantic City

Student protests increased in the US and France and later in the year, Mexico

Apollo 7 was launched from Florida for an eleven day journey to orbit the Earth 163 times

The Civil Rights Act was passed by Congress in April


Try a popular recipe from 1968!

From the 1968 cookbook Blue Ribbon Recipes:

Applesauce Brownies

½ cup shortening

12 cup cocoa

2 eggs

1 cup sugar

½ cup sweet applesauce

1 tsp. vanilla

1 cup flour

½ tsp. soda

1/8 tsp. salt

½ tsp. baking powder

½ cup black walnuts (optional)


Melt shortening; add cocoa, then eggs, then sugar. Beat all well. Add applesauce and vanilla Mix dry ingredients with nuts; add and mix well.

Pour onto greased/floured brownie sheet.

Bake 25 minutes at 350 degrees.


Share Button

Our Imaginations! Camp for Kids: Nature Prints

Our Imaginations! Camp for Kids: Nature Prints

The craft NATURE PRINTS was adapted from the project “From the Yard/Nature Prints” found in All-Around-the-House Art and Craft Book by Patricia Z. Wirtenberg and published by Houghton Mifflin Company in1968

Materials:

Leaves, bark, twigs

Printer’s inks or poster or acrylic paints in various colors (cheaper to use)

Drawing pencils (optional)

Rice or bond paper in white or various light colors (works best with poster/acrylic paints)

Brown wrapping paper or construction paper for use with printer’s inks

Brayer (or roller)

Piece of glass

Newspaper

Solvent for cleaning brayer and glass if using printer’s inks unless using water-soluble printer’s inks

  1. Collect fresh leaves from the trees or bushes in your neighborhood or yard. You will need some to experiment with and some for the last print. Other objects such as tree bark (if it’s easy to peel off) and even some twigs will work along with the leaves, too.
  2. Cover your work surface with newspaper. Lay down the glass and brayer on the work surface. Select the paints or inks that you will use. Acrylic or poster paints are less expensive than oil-based printer’s inks and easier to clean up after use.
  3. You can squeeze one color for each leaf or squeeze two or three colors side-by-side on the glass. The leaves in the samples shown used one or two or three colors at one time.
  4. Roll the paint or inks on the glass until the pigment covers the brayer. If you are using more than one color, let the colors run into each other. Roll the brayer over the leaf several times and turning the leaf over, lay it on a piece of paper like rice paper or bond paper. Use your hand to press the leaf so that it prints on the paper. Paper that is not too thick or too thin is the best to use if using acrylic or poster paints. Printer’s inks can use a slightly heavier paper like construction or brown wrapping paper.
  5. Remove the leaf and see how it printed on the paper. Experiment until you have a print that you like. Experiment with other materials from nature combined with the leaves.
  6. To create a mixed media design, color the whites of the leaves or the background paper or outline the printed leaves with colored pencils. See the two samples below.
  7. Frame the print or using old note card stationery, make note cards or poster cards of the printed leaves. They make a thoughtful gift for people who still write notes!
Nature Prints

Nature Prints


Nature Prints

Nature Prints


Nature Prints

Nature Prints


VARIATION:

Make a sun print! Make sure you do this on a sunny day! Choose the objects you will use as the main design of the print. Objects like leaves, twigs, bark, seashells, and pebbles work well. Lay the objects that you choose on photographic, construction or drawing paper on a surface in a sunny location. The longer you leave it there, the deeper an impression your objects will make on the paper. Leave the objects and paper in the sun for four hours minimum. Remove the objects. You now have a sun print! Use the sun print for the nature collage tutorial or frame it and hang the print on your bedroom wall.


Sun Print

Sun Print


Share Button