Category Archives: Art Tutorials

IT’S NOT QUILTING; IT’S QUILLING: HEART

IT’S NOT QUILTING; IT’S QUILLING: HEART
QUILLED HEART

QUILLED HEART

(2) 24” pink strips of quilling paper

(2) 24” white strips of quilling paper

(2) 24” strips of red, orange, cream, dark pink quilling paper each

Additional strips of paper in different colors

Scissors

Ruler

Glue


Cut two strips of 24” pink quilling paper in half. Cut two strips of white quilling paper in half. Alternate the colors.

Make a big loop and glue the four tips together. Let dry. Fold the loop so that it comes to a point, forming two loops. You now have a heart shape. Glue this center so that the heart shape holds.

Take two 24” strips of coordinating or contrasting quilling paper and coil tightly, first one color and then the other. Glue the tips.

Make 3 – 5 closed coils of various sizes. Begin to alternate two strips of different colors and coil them tightly. Glue the tips. Then coil three strips of different colors tightly. Glue the tips. Make big and small coils by adding more quilling strips if necessary to alternate the size of the coils.

Push through the center of the larger coils by to form a pyramid shape. Keep the other coils flat to add variety to the heart.

Glue the heart to card stock or cardboard of contrasting or coordinating color.

Share Button

IT’S NOT QUILTING; IT’S QUILLING: QUILLED CATERPILLAR

IT’S NOT QUILTING; IT’S QUILLING: QUILLED CATERPILLAR

(4) 24” quilling papers of different colors(2) 12” quilling papers of two of the colors used for the body of the caterpillar or choose contrasting colors

Quilled Caterpillar

Quilled Caterpillar

Glue

Scissors

Ruler


Glue the tips of the four quilling papers at one end. Curl slightly.  Leaving 1 ½” begin to fold the rest of the papers like an accordion. Fold tightly as you go along.

Leaving another 1 12” use your finger to make the antennae of the caterpillar.  Curl the tips.

Take the two 12” strips different colors and glue the tips. Curl into a tight coil. Use the one color first and then add the other or wind them together. When finished winding, glue the tips and glue below the antennae. Glue the caterpillar to cardboard or cardstock.

Share Button

NATURE CRAFTS: CELEBRATING OUR EARTH: NATURE PRINTS

NATURE CRAFTS: CELEBRATING OUR EARTH: NATURE PRINTS

The craft NATURE PRINTS was adapted from the project “From the Yard/Nature Prints” found in All-Around-the-House Art and Craft Book by Patricia Z. Wirtenberg and published by Houghton Mifflin Company in1968

MATERIALS:

Leaves, bark, twigs

Printer’s inks or poster or acrylic paints in various colors (cheaper to use)

Drawing pencils (optional)

Rice or bond paper in white or various light colors (works best with poster/acrylic paints)

Brown wrapping paper or construction paper for use with printer’s inks

Brayer (or roller)

Piece of glass

Newspaper

Solvent for cleaning brayer and glass if using printer’s inks unless using water-soluble printer’s inks

  1. Collect fresh leaves from the trees or bushes in your neighborhood or yard. You will need some to experiment with and some for the last print. Other objects such as tree bark (if it’s easy to peel off) and even some twigs will work along with the leaves, too.
  2. Cover your work surface with newspaper. Lay down the glass and brayer on the work surface. Select the paints or inks that you will use. Acrylic or poster paints are less expensive than oil-based printer’s inks and easier to clean up after use.
  3. You can squeeze one color for each leaf or squeeze two or three colors side-by-side on the glass. The leaves in the samples shown used one or two or three colors at one time.
  4. Roll the paint or inks on the glass until the pigment covers the brayer. If you are using more than one color, let the colors run into each other. Roll the brayer over the leaf several times and turning the leaf over, lay it on a piece of paper like rice paper or bond paper. Use your hand to press the leaf so that it prints on the paper. Paper that is not too thick or too thin is the best to use if using acrylic or poster paints. Printer’s inks can use a slightly heavier paper like construction or brown wrapping paper.
  5. Remove the leaf and see how it printed on the paper. Experiment until you have a print that you like. Experiment with other materials from nature combined with the leaves.
  6. To create a mixed media design, color the whites of the leaves or the background paper or outline the printed leaves with colored pencils. See the two samples below.
  7. Frame the print or using old note card stationery, make note cards or poster cards of the printed leaves. They make a thoughtful gift for people who still write notes!
Share Button

NATURE CRAFTS CELEBRATING OUR EARTH:PAINTED ROCKS

NATURE CRAFTS CELEBRATING OUR EARTH:PAINTED ROCKS


ROCKS

ROCKS

Kid’s Crafts: Painted Rocks


Materials:

Rocks preferably with a relatively smooth surface

Poster or acrylic paints

Brushes of various widths

Container for water

Palette or disposable smooth surface like wax paper

Soap

Paper towels

Newspaper or something similar to cover the surface of your work space


  1. Wash rocks thoroughly and dry. If rocks are very dirty, soak in a bucket of sudsy water, rinse and dry. Cover your work space
  2. Think of a design for the rock. Sometimes the rock suggests a design or an object. Stripes, dots, stars, swirls, circles are some ideas you can use alone or in combination.
  3. Select colors of paint and squeeze a small amount (about the size of a quarter to start) on the palette or wax paper.
  4. Prime the rock white if you selected lighter colors or brown if you selected darker colors. This step isn’t required but it makes the colors adhere to the rock better if there is a basic layer of paint to paint your design. Paint one side at a time and allow the rock to dry. Turn over and paint the other side.
  5. If you can’t think of a design, lay the paints on the surface randomly. Overlap the colors and see them run into each other.
  6.  Paint one side at a time and allow the design to dry. Turn over and paint the other side.
  7. Use your rocks to decorate your desk or your bedroom’s window sill.


VARIATION: Select yarn or string in different colors and dip into glue. Wrap around the

Share Button

NATURE CRAFTS CELEBRATING OUR EARTH: NATURE COLLAGE

NATURE CRAFTS CELEBRATING OUR EARTH: NATURE COLLAGE
SEE SAMPLE BELOW

The craft NATURE COLLAGE was adapted from the project “World of Nature/Spring Mural Collage” found in the Arts and Crafts Activities Desk Book by Joyce Novis Laskin and published by Parker Publishing Company in 1971.

MATERIALS:

White glue or glue stick

cardboard any size

Scissors

Any combination of: poster or acrylic paints, brushes, fabric scraps, newspapers, magazines, photos, pen and ink, crayons, construction paper, tissue paper, brown paper bags, ribbon, buttons, etc.

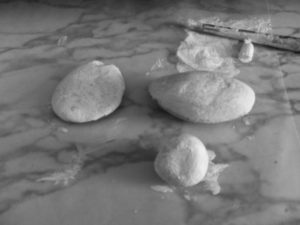
Objects from nature: leaves, twigs, bark, shells, pebbles, seeds from plants, etc.

1. A collage is a composition or picture made by attaching different found objects and materials to a surface. That surface is often (but not always) flat. Like all forms of art, the first step in making a collage involves thinking. What will the collage be about?

2. Decide the size of the collage. Glue, draw or paint everything on the cardboard so it is important to decide if you want a large or a small collage. Use a large sheet or cut it in half.

3. Next, decide if you want the design to flow across the cardboard (horizontally), from the top to the bottom (vertically) or from corner to corner (diagonally).To create depth, larger objects should stand in front of smaller ones. It is smart to work from the back to the front of the collage so glue the smaller objects first. This gives the person looking at the collage a feeling of depth. “Depth” means that you can see objects in back of the objects that are in front of the scene that you are creating.

4. Collect the materials that you will be using. Different materials make up a collage.  This collage project has one main subject (nature) so collect many objects from and about nature. Photographs, drawings of objects from nature (the sun, butterflies, bees, birds, clouds, etc.) can also be used.

Use cut paper, too. Cut the paper into different shapes suggesting nature (i.e., leaves and flowers) using scissors. This will produce paper edges that are wavy, zigzagged or straight.

Or fold the paper once. Turn the paper on the other side and fold again in the other direction. Tear the paper along the fold. Continue to fold and tear the paper into shapes. This creates ragged paper edges which will look different from the papers cut with scissors.

Glue the papers down and overlap them. The layers of tissue paper will show the color and shape of the paper or board underneath and create pretty designs.

5. Glue the materials to the cardboard. If you are not sure about the design, glue them to a piece of paper like construction paper. Then, decide if the materials can be added to the collage. If you decide that you can, glue the paper with the objects to the cardboard.

6. Frame the collage and hang on your bedroom wall!

VARIATION:

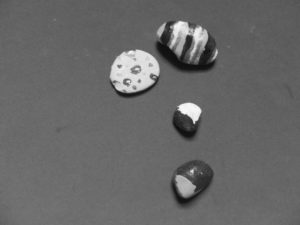
SEASHELLS: Find a couple of seashells. The kinds that are sort of flat are the best for this idea. Choose two or three colors of paint and squeeze some on a palette or piece of wax paper. Brush the paint on one side of the shell. Experiment with the amount of paint. Print the shell on a piece of construction paper by rolling it and pressing. Do this with the other colors and shells, occasionally overlapping some of the shells to create a pattern. To add another dimension to the shells, glue tiny seeds or pebbles on the ends of the printed shells. When the paint is dry, cut the printed shells and glue to the cardboard along with the other objects collected. (See the Summer Camp for Kids: Nature Prints tutorial on this website for more information.)

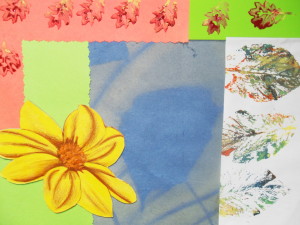
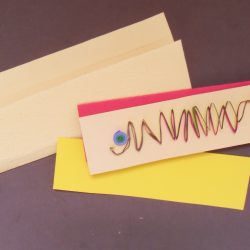
The collage below includes a drawing of a flower, a sun print of leaves and twigs, a part of a nature print of leaves and rubber stamped leaves. Assorted cut paper was used for the background

Nature Collage

Share Button

QUILLED (ITS NOT QUILTING): OCTOPUS NOTECARD

QUILLED (ITS NOT QUILTING): OCTOPUS NOTECARD

FIRST MAKE THE QUILLED OCTOPUS:

MATERIALS:

(3) 24” strips of light blue quilling paper

(3) 24” strips of medium blue quilling paper

(3) 24” strips of dark blue quilling paper

(4) 3” strips of purple quilling paper

(2) 3” strips of light blue quilling paper

(2) 3” strips of medium blue quilling paper

(2) 3” strips of dark blue quilling paper

Piece of cardstock or board

Glue

Ruler

Begin a tight coil using the light blue paper. When finished, glue the tip. Then wrap the medium blue paper tightly; glue the tip. Wrap the dark blue paper tightly and glue the tip.

For the eyes: tightly coil two of the purple strips separately and glue on to the face of the octopus.

For the tentacles: Bend one end of the strip of paper and make a wide curl with your finger. Curl the opposite end.  Glue the bent end to the octopus. Repeat for the other strips. Place four on either side of the head.

Push the coil out from the center to give the octopus a three-dimensional look.

Glue on card stock or colored cardboard.

THEN MAKE THE QUILLED OCTOPUS NOTE CARD

MATERIALS:

Card stock of various colors

Scissors

Glue stick

Pencil/eraser

  1. Trim the mounted octopus to an even length and width. The sample shown is 4” x 4 ½”.
  2. Measure and cut a piece of cardstock to 4” x 9” doubling the width but keeping the length to 4”. (Cardstock used for scrapbooking is ideal.)
  3. Measure and cut a piece of cardstock using a color that is compliments or contrasts with the color of the quilled octopus. Glue the pieces together and trim where necessary.
  4. Next measure and cut the envelope to 9” x 5”. Choose a color that compliments or contrasts with rest of your design. Mark with a pencil.
  5. Measure an area inside of that piece of cardstock to 5” x 4”. Above it measure an area 5” x 4”. Mark all areas with a pencil.
  6. Above that area measure an area 1” x 5” with a pencil.
  7. Fold at the creases and glue at the edges. Trim when necessary.
  8. Insert the quilled octopus into the envelope. You have a thank you or thinking of you note card.
Share Button

EL DIA DE LOS MUERTOS BANNER

EL DIA DE LOS MUERTOS BANNER
ELDIA DE LOS MUERTOS BANNER

ELDIA DE LOS MUERTOS BANNER

El Dia de los Muertos Banner 

Materials:

Felt in various colors

Puffy paint in bright and metallic colors

Pencil/eraser

Scissors

Glitter glue (optional)

Hole punch

Paper in various colors (optional)

Scraps of material (optional)

Decorative gems (optional)

String

Cardboard

White glue


Project:               

  1. Select a piece of felt for the background of the banner. Decide if the banner will be placed vertically or horizontally.
  2. Using different colors of the felt and using the letter stencils, trace and cut three letter E; one A; two L; one D; one I; two O; two S; one T; one U; and one R.
  3. Arrange the letters on the felt background. Glue. Allow to dry.
  4. Some objects associated with the Day of the Dead are skeletons, marigolds and skulls. Draw and cut flowers, skulls and skeletons out of the remaining felt or use paper or another material. Glue and let dry.
  5. Add sequins, glitter, beads, etc. to the overall design or add starbursts, the sun or other symbols appropriate to the holiday. Let dry.
  6. Punch holes in the top corners of the felt. Pass a piece of string longer than the length of the banner through one hole, tie a knot and then pass it through the second hole. Glue a strip of cardboard that fits between the holes and glue it to the back of the banner at the top. Let dry and hang up. Celebrate El Dia de los Muertos!
Share Button

QUILLING (IT’S NOT QUILTING): QUILLED HEART NOTE CARD

QUILLING (IT’S NOT QUILTING): QUILLED HEART NOTE CARD

FIRST MAKE THE QUILLED HEART

MATERIALS:

(2) 24” pink strips of quilling paper

(2) 24” white strips of quilling paper

(2) 24” strips of red, orange, cream, dark pink quilling paper each

Additional strips of paper in different colors

Scissors

Ruler

Glue

Cut two strips of 24” pink quilling paper in half. Cut two strips of white quilling paper in half. Alternate the colors.

Make a big loop and glue the four tips together. Let dry. Fold the loop so that it comes to a point, forming two loops. You now have a heart shape. Glue this center so that the heart shape holds.

Take two 24” strips of coordinating or contrasting quilling paper and coil tightly, first one color and then the other. Glue the tips.

Make 3 – 5 closed coils of various sizes. Begin by alternating two strips of different colors and coiling them tightly. Glue the tips. Then coil three strips of different colors tightly. Glue the tips. Make big and small coils by adding more quilling strips if necessary to alternate the size of the coils.

Push through the center of the larger coils by to form a pyramid shape. Keep the other coils flat to add variety to the heart.

Glue the heart to card stock or cardboard of contrasting or coordinating color.

THEN MAKE THE QUILLED HEART NOTE CARD:

MATERIALS:

Card stock of various colors

Glue stick

Scissors

Pencil/eraser

  1. Trim the quilled heart to an even length and width. The sample shown measures 4” x 4 ¾”.
  2. Measure and cut a piece of cardstock to 8” x 4 ½” doubling the width of the cardstock but keeping the height of the original. (Cardstock used in scrapbooking is ideal.) Choose a color that compliments or contrasts with the colors of the quilled heart. Fold in half.
  3. Measure and cut a second piece of cardstock of another color and cut it to 8”x 4 ½”. Glue the pieces together and trim where necessary.
  4. Select a fourth sheet of cardstock in a contrasting complimentary color. Mark an area 10 ¾” x 4 ¾” with pencil. Cut. This will be the envelope.
  5. Measure an area 4 ¾” x 5” at the bottom of the first area with pencil.
  6. Measure a second area above that 4 ¾” x 5”.
  7. Measure and mark with pencil a third area above the second 1” x by 4 ¾ “. Fold at the creases and glue at the edges.
  8. Insert the quilled card in the envelope. You have a blank card to write a thank you or a thinking of you note.
Share Button

QUILLING (IT’S NOT QUILTING): QUILLED FLOWER NOTE CARD

QUILLING (IT’S NOT QUILTING): QUILLED FLOWER NOTE CARD

Quilled Flower

Quilled Flower Card

FIRST MAKE THE QUILLED FLOWER

MATERIALS:

(Colors mentioned below are optional. Think about using the recipient of the card’s favorite colors instead.)

(3) 24” strips of orange quilling paper (for the center of the flower)

(1) 24” strips of brown quilling paper (for the center of the center of the flower)

(4) 12” strips of yellow quilling paper (for the petals)

(4) 12” strips of orange-yellow quilling paper (for the petals)

(4) 3 ½” strips of orange-yellow quilling paper

(3) 12” strip of brown quilling paper (for the petals)

Cardstock or cardboard

Glue

Ruler

scissors

scissors

Tightly coil three 24” strips of orange paper and glue the tip. This is the center of the flower.

Using the 12”strips of yellow paper, make a small loop and secure the tip with glue. Continue to make a loop slightly larger than the first, securing the tip again. Repeat this pattern until there is no more paper to make a loop. Be sure each loop is bigger than the last one and glue the tip each time you make a loop.

These will be the petals of the flower. Continue with the rest of the yellow strips until you have four completed yellow petals consisting of open loops.

Continue this pattern with the orange-yellow strips until you have four completed flower petals. In the end, there will be a total of eight petals.

Make petals with the 12” strips of brown paper making the loops smaller.

On cardstock or cardboard, trace the flower’s center lightly with pencil. Arrange the yellow and orange-yellow petals evenly around this circle and glue down. Glue the brown petals randomly around this circle.

Glue the center of the flower down. Take one end of the 3 ½” strips of orange-yellow quilling paper and curl the tip. Finish curling the tips of the 3 1/2 inch orange-yellow papers. Glue the other end randomly through-out the petals.

THEN MAKE THE QUILLED FLOWER NOTE CARDS

MATERIALS:

  1. Trim mounted quilled flower to an even height and width. The sample shown is 5 ¼” x 5 ½”.
  2. Measure and cut a piece of cardstock to 10 ½” x 5 ¼” doubling the width but keeping the height to 5 ¼”. (Cardstock for scrapbooking is ideal.) Choose a color that compliments or contrasts with the colors of the quilled flower.
  3. Measure and cut another piece of cardstock in another color to 10 ½’ x 5 ¼”. Glue the three pieces and trim where necessary. Glue the pieces together.
  4. Choose a third sheet of cardstock for the envelope. Choose a color that compliments or contrasts with the colors of the quilled flower. Measure an area 5 ¾” x 5 ½”. Mark with a pencil. Cut.
  5. At the bottom of the cardstock, measure an area 5 3/3” x 5 ½” in pencil.
  6. Above that measure an area 5 3/3” x 5 ½” in pencil, too.
  7. Above that measure an area 1” x 5 ¾” and fold the marked areas at the creases. Glue at the edges.
  8. Insert the quilled card in the envelope. You have a blank card to write special wishes
Share Button

QUILLING (IT’S NOT QUILTING): CATERPILLAR NOTECARD

QUILLING (IT’S NOT QUILTING): CATERPILLAR NOTECARD

FIRST MAKE THE QUILLED CATERPILLAR

MATERIALS:

(4) 24” quilling papers of different colors

(2) 12” quilling papers of two of the colors used for the body of the caterpillar or choose contrasting colors

Glue

Scissors

Ruler

Glue the tips of the four quilling papers at one end. Curl slightly.  Leaving 1 ½” begin to fold the rest of the papers like an accordion. Fold tightly as you go along.

Leaving another 1 12” use your finger to make the antennae of the caterpillar.  Curl the tips.

Take the two 12” strips different colors and glue the tips. Curl into a tight coil. Use the one color first and then add the other or wind them together. When finished winding, glue the tips and glue below the antennae. Glue the caterpillar to cardboard or cardstock.

THEN MAKE THE QUILLED CATERPILLAR NOTE CARD

MATERIALS:

Cardstock of various colors

Scissors

Pencil/ruler

Glue stick

  1. Trim mounted caterpillar to an even length and width. The sample shown is 8” x 2 ½”.
  2. Measure and cut a piece of cardstock to 8” x 4 ½” doubling the height of the cardstock but keeping the width to 8”. (Cardstock used for scrapbooking is ideal.) Choose a color that picks up one of the colors of the caterpillar. Fold in half.
  3. Cut and measure a piece of cardstock of another color to 8” x 2 ¼”. Glue the three pieces together, trimming where necessary.
  4. Select a fourth sheet of cardstock. This piece of cardstock and compliment or contrast the other colors. Measure an area 6 ½” x 8 ½”. Then subdivide an area 8 ½” x 2 ½” and mark it lightly with a pencil.
  5. Above that measure an area 2 ½” x 8 ½” and mark it with a pencil.
  6. Above that measure an area 1” x 8 ½” with pencil, too. Fold the marked areas forming an envelope. Glue the three sides at the edges.
  7. Insert the quilled card in the envelope. You have a blank card to write a thank you or a thinking of you note.
Share Button