
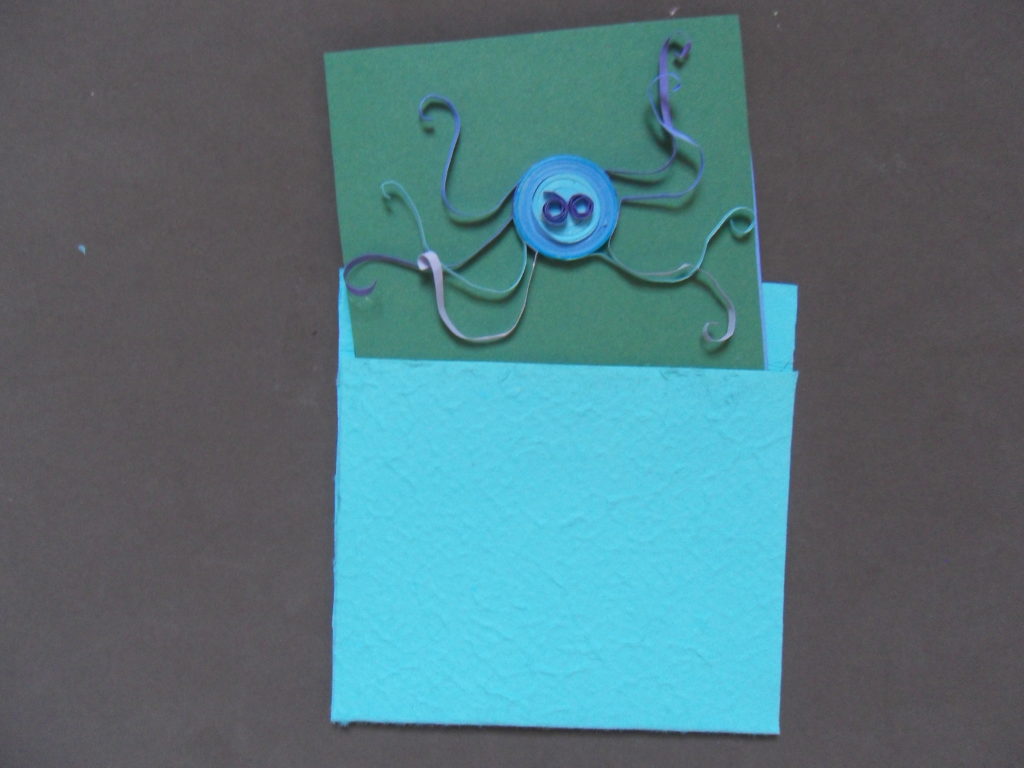
FIRST MAKE THE QUILLED OCTOPUS:
MATERIALS:
(3) 24” strips of light blue quilling paper
(3) 24” strips of medium blue quilling paper
(3) 24” strips of dark blue quilling paper
(4) 3” strips of purple quilling paper
(2) 3” strips of light blue quilling paper
(2) 3” strips of medium blue quilling paper
(2) 3” strips of dark blue quilling paper
Piece of cardstock or board
Glue
Ruler
Begin a tight coil using the light blue paper. When finished, glue the tip. Then wrap the medium blue paper tightly; glue the tip. Wrap the dark blue paper tightly and glue the tip.
For the eyes: tightly coil two of the purple strips separately and glue on to the face of the octopus.
For the tentacles: Bend one end of the strip of paper and make a wide curl with your finger. Curl the opposite end. Glue the bent end to the octopus. Repeat for the other strips. Place four on either side of the head.
Push the coil out from the center to give the octopus a three-dimensional look.
Glue on card stock or colored cardboard.
THEN MAKE THE QUILLED OCTOPUS NOTE CARD
MATERIALS:
Card stock of various colors
Scissors
Glue stick
Pencil/eraser
- Trim the mounted octopus to an even length and width. The sample shown is 4” x 4 ½”.
- Measure and cut a piece of cardstock to 4” x 9” doubling the width but keeping the length to 4”. (Cardstock used for scrapbooking is ideal.)
- Measure and cut a piece of cardstock using a color that is compliments or contrasts with the color of the quilled octopus. Glue the pieces together and trim where necessary.
- Next measure and cut the envelope to 9” x 5”. Choose a color that compliments or contrasts with rest of your design. Mark with a pencil.
- Measure an area inside of that piece of cardstock to 5” x 4”. Above it measure an area 5” x 4”. Mark all areas with a pencil.
- Above that area measure an area 1” x 5” with a pencil.
- Fold at the creases and glue at the edges. Trim when necessary.
- Insert the quilled octopus into the envelope. You have a thank you or thinking of you note card.


Share this:


