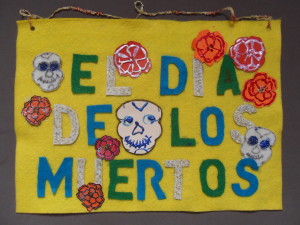
El Dia de los Muertos Banner
The Day of the Dead celebration is a mixture of Catholic and pre-historic Hispanic beliefs about death. The Spanish conquistadors brought their religious faith to the Americas but their beliefs dated back to the early Christians’ adoption of the customs of the ancient Egyptians and Romans.
Over time, October 31st evolved into All Hollows Eve when the spirits of dead children came to visit. November 1st became All Hallows or All Saints Day, a day to pray for the innocent souls of the saints and martyrs and November 2nd became All Souls Day, a day to remember the spirits of sinners who had died.
Today, the Day of the Dead celebration is a family commemoration reuniting the living with their dead relatives. Each family and community has its own way of celebrating but several communities throughout Mexico observe many of the same customs.
October 31st is a day of preparations for the celebration. Families shop at the local market for supplies of food and items like copal (a resin-based incense), marigolds, candles and calaveras de dulce (sugar skulls).
Back home, children make an altar decorated with small baskets of nuts, hot chocolate in small cups, sugar skulls, flowers, fruit, and toys. They light incense and small candles that will light the way for the angelitos (little angels) to come to earth.
November 1st, families eat an early breakfast of pan de muertos (bread of the dead), hot chocolate, atole, and tlalludas (chicken broth served with large tortillas). Afterwards, the family does the necessary chores to prepare their house for visitors.
The women of the house make tamales de mole (mole sauce and chicken folded inside a tortilla which is then wrapped in corn husks and tied with string) which they steam in a large pot. Another family member makes a second trip to the market to buy sugar canes and more marigolds.
The family builds a larger altar on a table decorated with a colorful cloth, a crucifix, pan de muertos, fruit, flowers, cups of chocolate and atole, a small offering of cooked tamales, and the special things the deceased enjoyed during their life on earth. They light a bowl of lamp oil and a candle for each dead relative which they place in front of their photos.
The sound of fireworks and the ringing of church bells announce that the spirits of the dead are on their way to earh. The bells ring without stopping for twenty-four hours, rung by teams of young men.
Families wear their best clothes and visit through the entire day and night and into the next day, bringing empty baskets which they fill with items from the altars of the homes they visit. Host families visit friends and family, too.
On November 2nd, families visit the cemetery, cleaning and decorating the graves and tombs with flowers. They bring picnic food which is an offering to the dead. The families believe that the dead do not actually eat the food but “inhale” it.
The bells stop ringing at 3 p.m. signaling that the dead are departing. Celebrants eat, sing, laugh, visit with their neighbors, and children play. When night falls, candles are lit on the tombs and graves.
Families exit the cemetery, too, until they begin next year’s celebrations all over again.
BIBLIOGRAPHY
Ancona, George. Pablo Remembers the Fiesta of the Day of the Dead. Lothrop, Lee and Shepard Books: New York, 1993
Coleman, Miriam. The Culture and Crafts of Mexico. New York: PowerKids Press, 2016.
Krull, Kathleen. Maria Molina and the Days of the Dead. MacMillan Publishing Company: New York, 1994.
El Dia de los Muertos Banner Design
Materials:
Felt in various colors
Puffy paint in bright and metallic colors
Pencil/eraser
Scissors
Glitter glue (optional)
Hole punch
Paper in various colors (optional)
Scraps of material (optional)
Decorative gems (optional)
String
Cardboard
White glue
Project:
- Select a piece of felt for the background of the banner. Decide if you want to hang the banner vertically or horizontally.
- Using different colors of the felt and using the letter stencils, trace and cut three E; one A; two L; one D; one I; two O; two S; one T; one U; and one R.
- Arrange the letters on the felt background. Glue. Allow to dry.
- Some objects associated with the Day of the Dead are skeletons, marigolds and skulls. Draw and cut flowers, skulls and skeletons out of the remaining felt or use paper or another material. Glue and let dry.
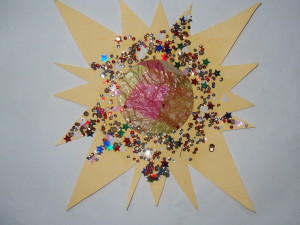
- Add sequins, glitter, beads, etc. to the overall design or add starbursts, the sun or other symbols proper to the holiday. Let dry.
- Punch holes in the top corners of the felt. Pass a piece of string longer than the length of the banner through one hole, tie a knot and then pass it through the second hole. Glue a strip of cardboard that fits between the holes and glue it to the back of the banner at the top. Let dry and hang up. Celebrate El Dia de los Muertos!
Like this:
Like Loading...