Tag Archives: craft project for kids

RECYCLED CRAFT PROJECT: VEGGIE PRINTS GIFT WRAP PAPER

RECYCLED CRAFT PROJECT: VEGGIE PRINTS GIFT WRAP PAPER


MATERIALS:

Reused paper from mailed packages or paper bags or tissue paper

Any items with interesting shapes that you can paint, i.e. sponges

Idaho potatoes

A bunch of celery

Carrots (carrots may be too hard to carve designs but can be used to stamp circles)

Acrylic paints

Paint brushes

Butter knife

Cookie cutters


VARIATIONS (use alone or with the celery, carrots and potatoes):

Rubber stamps

Ink for rubber stamps
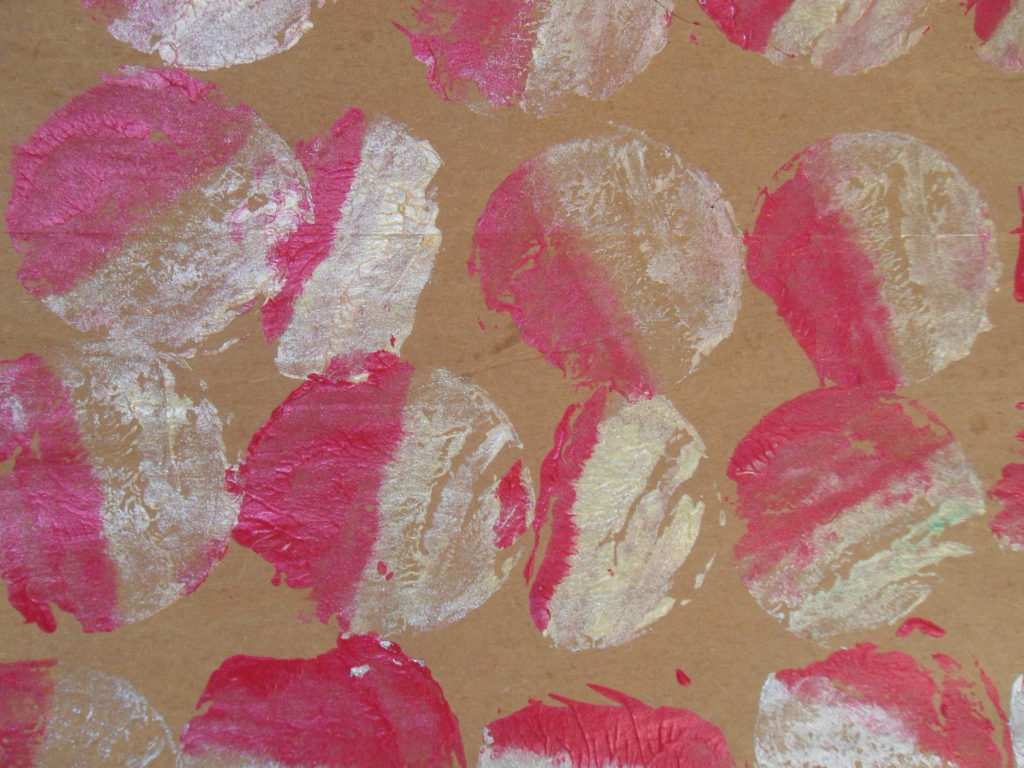
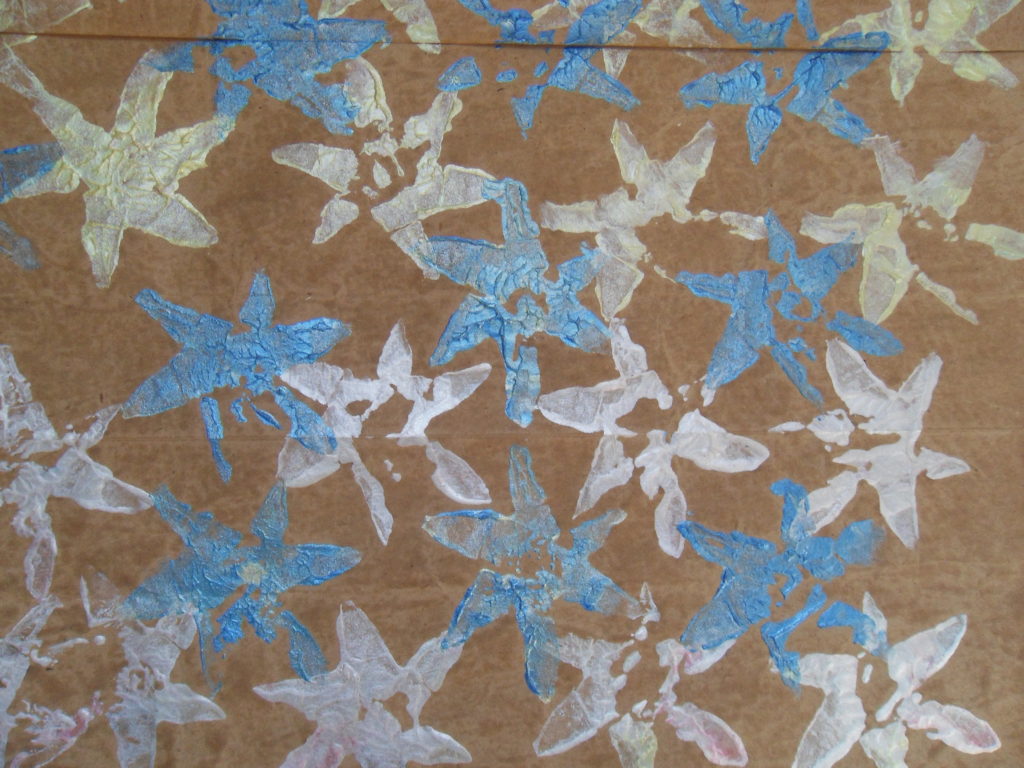
NOTE*

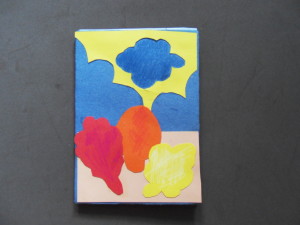
The veggie prints (above) were done with a sweet potato and poster paints applied with a brush directly on the potato surface.


 PROJECT:

  1. Cut off bottom of celery. Paint the bottom of the stalk with acrylic paint and stamp it on the paper. To use more than one color, wash off the celery and start over.
  2. Slice the carrot into discs. Carrots are suitable for stamping circular designs.
  3. Peel and cut a potato in large discs. Use cookie cutters to make shapes on the potato or make your own shapes.
  4. Paint these “stamps” (using and odd number of colors like 3 or 5) and stamp them on the paper in a pleasing pattern.
  5. Use rubber stamps together with the veggies or alone to form patterns.
  6. Allow the ink and/or acrylic paint to dry before wrapping gifts.


Share Button

RECYCLED CRAFT PROJECT: PAPER BAG BOUQUETS

RECYCLED CRAFT PROJECT: PAPER BAG BOUQUETS
PAPER BAG BOUQUET

PAPER BAG BOUQUET


MATERIALS:

Dried or silk flowers

Small brown paper bags

Sand, beans, rice, or bird seed for the base

Scissors or clippers

Raffia, twine, yarn, ribbon or string

Washi tape

Rubber stamps (optional)

Ink pads (optional)

Crimping scissors


PROJECT:

  1. Cut your bag to the size you desire.* Fill it with sand, beans, rice, or bird seed. This will hold the flower stems and keep your bag from falling over.
  2. Trim the top of the bag with the crimping scissors to give it a more decorative look.
  3. Use washi tape to decorate the bag. Or use rubber stamp designs in different colors.
  4. Cut the stems of the flowers short enough so they don’t fall over when you stick them in the bag.
  5. Tie string, ribbon or raffia around the neck of the bag.

*Any size bag will do as long as the flower stems show above the top of the bag.

VARIATION:

Use rubber stamps and ink pad to decorate the bags. Before the ink dries, sprinkle the designs with glitter dust. Shake the excess off. Allow to dry before completing project.

Share Button

RECYCLED CRAFT PROJECT: PAPER BEADS

RECYCLED CRAFT PROJECT: PAPER BEADS
PAPER BEADS

PAPER BEADS

MATERIALS:

Brightly colored paper from magazines, scraps of gift wrap, catalogs, etc. or craps of thin paper stock.

White glue or glue stick

Scissors

Pieces of Yarn, string, fishing line, plastic-coated wire,or pipe cleaner etc.

Additional embellishments: tiny beads, glitter, small stickers (optional)


PROJECT:

  1. Cut long skinny triangles of paper, approximately 1” wide and 4” long.
  2. For each bead, smear glue on half of one triangle toward the tip.
  3. As you roll each triangle up, leave a hole through the middle for your string to go through.
  4. When the glue has dried, string the beads into necklaces, bracelets and even garlands.

VARIATION:

Measure and cut long strips of paper 1″ wide and 4″ long instead of cutting long skinny triangles of paper. Roll up or not too tightly around a pencil and secure with a spot of glue at the tip.

TIP:

Pipe cleaners can be bent to the shapes you desire: circles, ovals, etc. and the pipe cleaner will hold that shape.


Share Button

Holiday Craft: Iridescent Angel

Holiday Craft: Iridescent Angel

Iridescent Angel

IRIDESCENT ANGEL

*MATERIALS:

2 wood hearts

Wood knob or ball

18” long pink or white ribbon

clay pot

Flesh, brown, black and white paint (2 more colors of choice)

1 11/2” brass ring

Moss

1(1/2 oz.) crystal iridescent glitter

2 jars or bowls for water

Brushes/scissors/white glue/plastic baggie

1. Paint the bottom and sides of the clay pot with two coats of white paint. Set aside to dry between the first and second coats.
2. Fill half a small plastic bag with glitter. Paint the two wooden hearts with white acrylic  paint. Place the wooden hearts in the plastic bag, tie it with a twist tie and shake. Be sure that the hearts are totally covered on the one side with the glitter. Remove the hearts and let them dry. These will be the angel’s wings.
3. The wooden knob is head of the angel. Paint it flesh or brown or black. Let it dry.
4. Paint the clay pot with dabs of different colors: pink and silver or any other color combination
5. While it is still wet, place the pot into the baggie filled with glitter. Shake well and cover the entire pot with glitter. Remove and let it dry.
6. Cut the moss. Roll the back of the angel’s head in tacky glue and then roll the head in the moss. This is the hair of the angel. Trim excess “hair” with scissors.
8. Cut a long piece of ribbon and fold it in half. Pull the loop through the clay pot and position it. Tie the ends in a large double knot and pull the ribbon completely through the hole in the clay pot.
9. Glue the brass ring on top of the angel’s head. Glue the head to the pot. Glue the hearts to the back of the pot with the glittery side facing you.
10. Enjoy the iridescent angel for the holidays!

Recycle materials: Cut pieces of paper (for example, leftover tissue, rice or wrapping paper) and glue them to the pot, overlapping the pieces so the different colors and patterns show through the layers.

Other ideas: Instead of a clay pot, use a spool of thread once the thread has been used up.
Replace the moss with scraps of yarn or ribbon for the hair
Do you have leftover clay? Roll it into a ball, let it harden and use it for the angel’s head


Share Button

CELEBRATE THE SEASONS! Mr. and Mrs. Snow People Winter Mobile!

CELEBRATE THE SEASONS! Mr. and Mrs. Snow People Winter Mobile!
WINTER MOBILE

WINTER MOBILE

Ages: 5 – 12 years

Time: ½ hour – 1 hour

MATERIALS:

Construction paper or Craft Foam in 6 colors

Silver glitter pen

Ball of jute or string or wire

2 dowel rods cut to 12” each Scissors

Tacky glue or glue sticks

Pencil/eraser

hole puncher

Patterns from the Banners project


  1. Ask an adult to cut the dowel rods so that you have two. Cross them in the middle and tie them tightly with a piece of string or jute or wire. Lay aside.
  2. Select the paper or craft foam. You may want to use a combination of papers and craft foam. Trace and cut shapes from the patterns used for the winter banner: Mr. Snow Man and Mrs. Snow Woman. Adorn them with scarves, hats/berets, noses that look like carrots, buttons, and a pipe for Mr. Snow Man. On a separate sheet of craft foam or construction paper, draw snowflakes with the glitter pen. Cut them along with the Snow Man and Woman. Draw eyes and mouth with a black marker.
  3. Poke a hole towards the top of the paper or craft foam shapes with a pencil or use a hole puncher.
  4. Then, lace a piece of string, thread, jute, or wire 6” to 8” in length through the hole at the top of each shape. Tie the shapes to the dowel rods. To balance the mobile, place two or more shapes to each dowel rod and be sure that some of the shapes hang lower (or higher) than some of the others. This is called balancing or making the mobile level. Ask an adult for help.
  5. Tie a piece of string on the ends of the dowel rods and hang it up. Does your sculpture move? What makes it move? How is this design different from the banner design? What are the differences? What are the similarities?
Share Button

Kid’s Crafts: Accordion Mini-Album for Father’s Day

Kid’s Crafts: Accordion Mini-Album for Father’s Day

*Materials:

Cardboard for the cover of the mini-album

Rice paper or wrapping paper or any light-weight paper to cover the mini-album

White glue, rubber cement, glue stick

Bond, construction, scrapbook paper, wrapping paper to mount the photos

Double-sided mounting squares or corners

Materials for decorating mini-album: sequins, glitter, paper, stickers, rubber stamps/stamp pad, markers, colored pencils

*Refer to the photos when necessary . Variation of the craft below the How-to.


1.  Measure the photos you selected for the album. Using those measurements, measure and cut two pieces of cardboard. If you are using thin cardboard, measure and cut four pieces. Glue two together and glue the other two together. This will make the cover of the album stronger. If you are using matt board or similar thick board, you do not have to do this. Allow to dry.
2.  If you are using 2 – 4 photos, measure four sections the height and width of the photos along the length of the bond, construction, wrapping paper or scrapbook paper of your choice. In other words, if your photos are 3 1/2” x 5”, you will measure four continuous sections each measuring 3 ½” x 5”. Cut the length of the paper (do not cut the individual sections) and fold in four. This will be the accordion or inside of the album.
3.  Select the paper you will use to cover the cardboard. If your cover measures 3 ½” x 5” add ½” to all four sides of the paper. Cut. You will fold the excess paper and glue it to the backside of the cover.  (The excess paper will be hidden by the accordion. This will become clearer in the next step.)
4.  Fold down and glue the corners first. Then fold down and glue the sides. Apply thicker glue when using thicker paper. Allow to dry. Use pressure so that the paper sticks firmly to the cardboard.
5.  Check the accordion paper against the cover and trim paper if necessary. Glue one folded section of the accordion to the inside of one of the covers. Glue the other end to the other cover.  Apply pressure and allow the glue to dry.
6.  Mount the photos using double-sided mounting squares. Decorate the cover with stickers, stamped art, markers, cut paper, sequins, and more.
Happy Father’s Day!

VARIATION: Don’t want to download photos? Sketch a self-portrait of you and family members instead!

Share Button

Kid’s Crafts: Flowers for Mother’s Day!

Kid’s Crafts: Flowers for Mother’s Day!

Kid’s Crafts: Flowers for Mother’s Day


Materials:

Popsicle sticks (use wide popsicle sticks if they are available)

Craft Foam in various colors, construction paper or paper with designs or patterns

Glue or glue stick

Scissors

Pencil with eraser

Markers in brown and/or green or poster or acrylic paint in brown and/or green

Pompoms in various colors (optional)

Patterns (below)

  1. Trace and cut patterns: there are two sets for two kinds of flowers.
  2. Select papers or Craft Foam for the flower petals or the round flower. Trace patterns and cut.
  3. Use petal patterns for the leaves. Trace and cut in green Craft Foam or other craft paper. Use a minimum of two leaves per flower.
  4. Paint Popsicle stick in brown or green or color with markers or paint.
  5. Glue petals around the Popsicle stick or glue the round flower at the top of the Popsicle stick.
  6. Glue a pompom in the center. Or trace a penny or other small coin on the Craft Foam or other paper of choice for the center of the flowers. Cut and glue.
  7. Place in plants to give as gifts for Mother’s Day. Or make several flowers and place in a vase.


Happy Mother’s Day!

Patterns for Mother's Day Flowers Project0001


Share Button