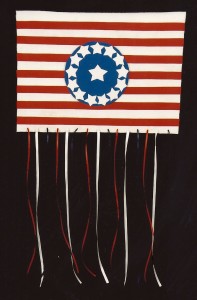
Halloween Banner Design Sample
HALLOWEEN: A VERY BRIEF HISTORY
Halloween began as the ancient Celtic festival of Samhain. The Celts lived in western and central Europe as early as 800 B.C. They followed a religion called Druidism, named after their priests who were known as the Druids. The Druids celebrated Samhain, the festival of the harvest, because it marked the end of one year and the beginning of the next. The Druids also used Samhain to predict the important events of the coming year.
The Druids believed that the spirits of the dead visited their families before the first day of winter. They taught their followers to light bonfires on sacred hilltops so that these spirits could find their way to their former homes on earth.
By the end of the first century A.D. the Romans had conquered the lands of the Celts. They mixed the Celts’ traditions and early Christian customs with their own.
Later on, most of the inhabitants of Ireland, Scotland, Wales and Britain converted to Christianity and no longer celebrated Samhain. These converts used the old rituals and traditions as part of their Christian worship but cleansed them of their pagan meaning.
However, not everyone changed their religion. During the Middle Ages, pagan priests and their followers turned to the practice of witchcraft. Witches flew to their Sabbaths, or meetings, on broomsticks with their black cats as companions. One of their most important Sabbaths was held on October 31st, which is today’s Halloween.
In Ireland, Scotland, Wales, and Britain, local inhabitants continued to light bonfires. Pranks and tricks became common. In Ireland, groups of people would go door-to-door demanding food and other gifts in preparation for Halloween. If the visitors were refused a treat, the party-goers would play a trick on the residents of the house.
Halloween did not become a popular secular holiday in the U. S. until the 1880’s. Black cats, carved pumpkins, witches, candles and masks became popular symbols of the holiday. By then, most Americans considered Halloween a holiday for children.
HALLOWEEN BANNER
Ages: 5 – 12 years Time: ½ hour – one hour
MATERIALS:
Black fun foam (2) 10 mm wiggle eyes
White Fun Foam excelsior (or moss or raffia)
Yellow Fun Foam Dark blue felt 36”x 36”
Green Fun Foam (3) ½” green or dark blue pompom
Orange Fun Foam Patterns provided below
Measure and trim dark blue felt to 14” x 20”. Place felt piece vertically. Measure and fold a 1” seam at the top. Iron. Fold a second 1” seam.
Iron and glue the second fold. (You will be inserting the dowel rod through this.)
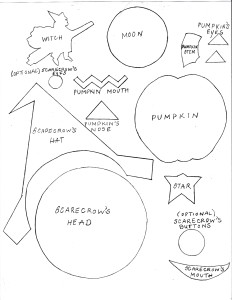
As this is drying, trace and cut the patterns provided (enlarge patterns as needed):
Cut the pumpkin out of the orange Fun Foam
Cut the pumpkin stem out of the green Fun Foam
Cut the witch out of the black Fun Foam
Cut the moon out of the white Fun Foam
Cut the scarecrow’s face out of orange Fun Foam
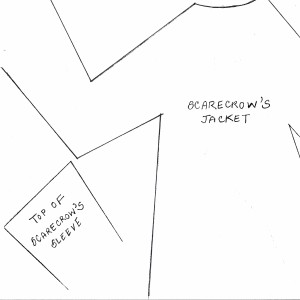
Cut the scarecrow’s jacket and hat out of yellow Fun Foam
Cut the scarecrow’s nose and mouth out of white Fun Foam
Cut the stars out of white Fun Foam
Apply tacky glue to Fun Foam pieces with a Popsicle stick and adhere them to dark blue felt background. Use the photo of the completed banner above as a guide.
Place a small amount of glue around the scarecrow’s neck. Add excelsior. Press and let dry.
Glue wiggle eyes to the scarecrow’s face. Glue pompom to the jacket.
Or using the patterns provided, cut eyes out of Black Fun Foam and buttons out of Green Fun Foam. Glue nose and mouth to scarecrow’s face. Let all the pieces dry.
Glue the pumpkin pieces to the pumpkin’s face. Glue the green stem.
Insert dowel rod through the loop at the top of the dark blue felt background. Measure and cut a piece of string 22” x 36”. Tie the string to each end of the dowel rod.
Enjoy your Halloween Banner!
VARIATION: The Halloween Banner design was inspired by these traditional symbols. However, you can substitute your own Frankenstein, Dracula, witch or ghost design.
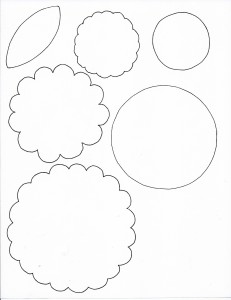
Patterns for Halloween Banner
Patterns for Halloween Banner
Like this:
Like Loading...