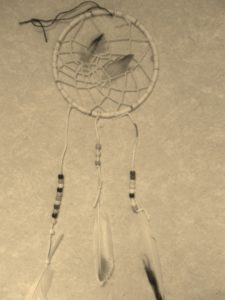
Dream-catchers
The Lakota hang dream-catchers where they sleep or over the cradles of babies. Good dreams go through the hole in the center of the dream-catcher while bad dreams are caught in the webbing like flies in a spider web.
MATERIALS:
6 inch embroidery hoop or large metal ring
2 yards of string or yarn
Beads, wood, feathers
Scissors
Glue
PROJECT:
- With a pencil make 8 equidistant marks around the embroidery hoop. If using a metal ring, make the marks with the black marker.
- Knot one end of the string or yarn on one of the marks. Leave about 3 inches hanging.
- Tie the yarn to the next mark and so on until there is yarn looped to each mark.
- Tie and loop the string from the middle of one loop to the middle of the next. Do not pull the string or yarn tightly. Continue to loop in this way making three or four rows of loops while occasionally stringing a bead. This is optional.
- When only a small “hole” is left in the center, pull the string tightly and knot the end of the string to the previous row. Tie a second knot to prevent unraveling. Trim excess string. A bit of glue will reinforce the knot. This is optional.
- Take the original 3 inch piece of string and tie it to the inside of the web. Tie a second knot and trim any excess. A bit of glue will reinforce the second knot.
- Tie a piece of string about 5 inches or more to the bottom of the dream-catcher. Toward the bottom half of the string loop two or three (or more) beads and tie a knot. Leave enough string to tie around the tip of a feather. You can make as many as two or three of these but vary the lengths to make a more interesting design.
- Reinforce the knots if necessary with glue. Insert feathers into the web of the dream-catcher. This is optional.
- Tie a loop of the string or yarn at the top of the dream-catcher so you can hang it up.
NATIVE AMERICAN ART – A BRIEF INTRODUCTION
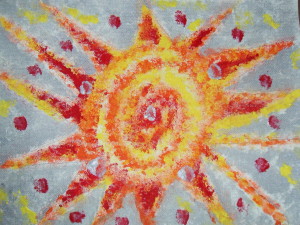
Native Americans imbued art into everyday objects: baskets, textiles/weaving and pottery. They placed all their hopes and fears into their art. Colors, patterns and symbols reflected their views of the creator and the inner spirit of people and animals. These colors, shapes and symbols held different meanings for different tribes but some general meanings apply.
Colors:
Blue: female, moon, sky, water, thunder, sadness
Black: male, cold, night, disease, death, underworld
Green: earth, summer, rain, plants
Red: war, day, bold, wounds, sunset
White: winter, death, snow
Yellow: day, dawn, sunshine
Shapes:
Curves and spirals
Parallel lines
Flowing lines, i.e. plants and flowers
Birds, fish and human faces
Triangles, rectangles, squares and other geometric shapes
Bibliography
Haslam, Andrew. Make It Work! Native Americans. Minnetonka, MN: Two Can Publishing, 1995.
Gooch, Randall and Temko, Florence. Traditional Crafts from Native North America. Minneapolis, MN: Lerner Publications, 1996.


Share this: