Materials:
Paper in various colors
Scissors
Pencil/eraser
Ruler or yard stick
Markers
Glue stick
Hole puncher
Pipe cleaners, string, paper twists or similar material
Number stencils or templates (optional)
One chain link fence
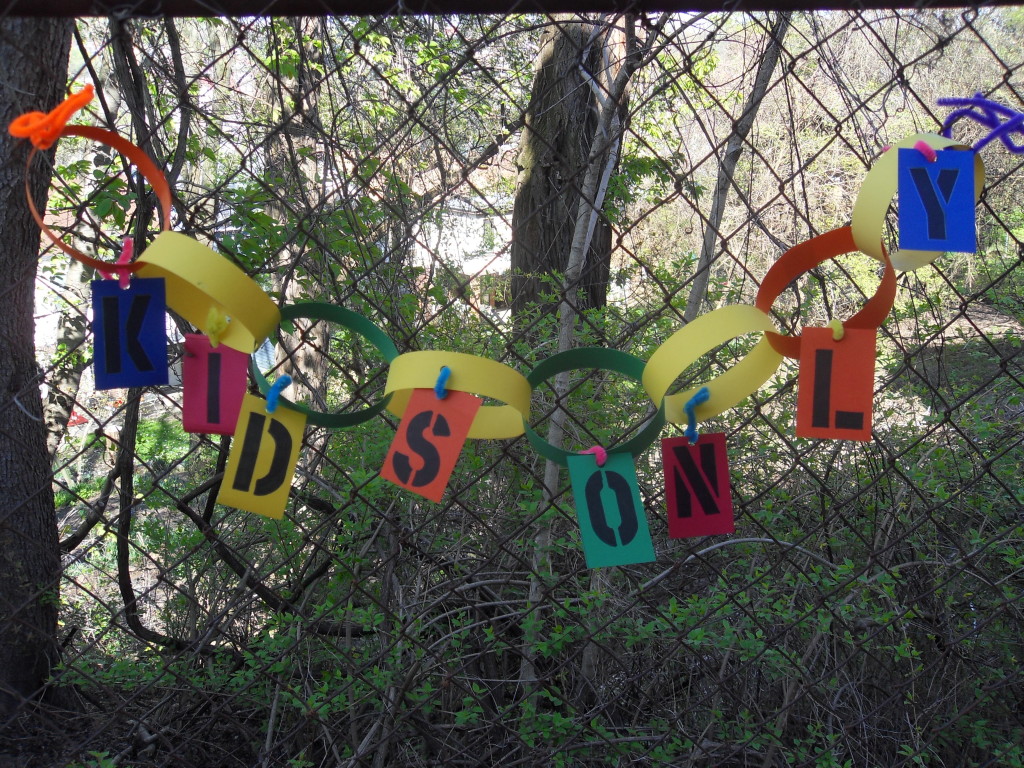
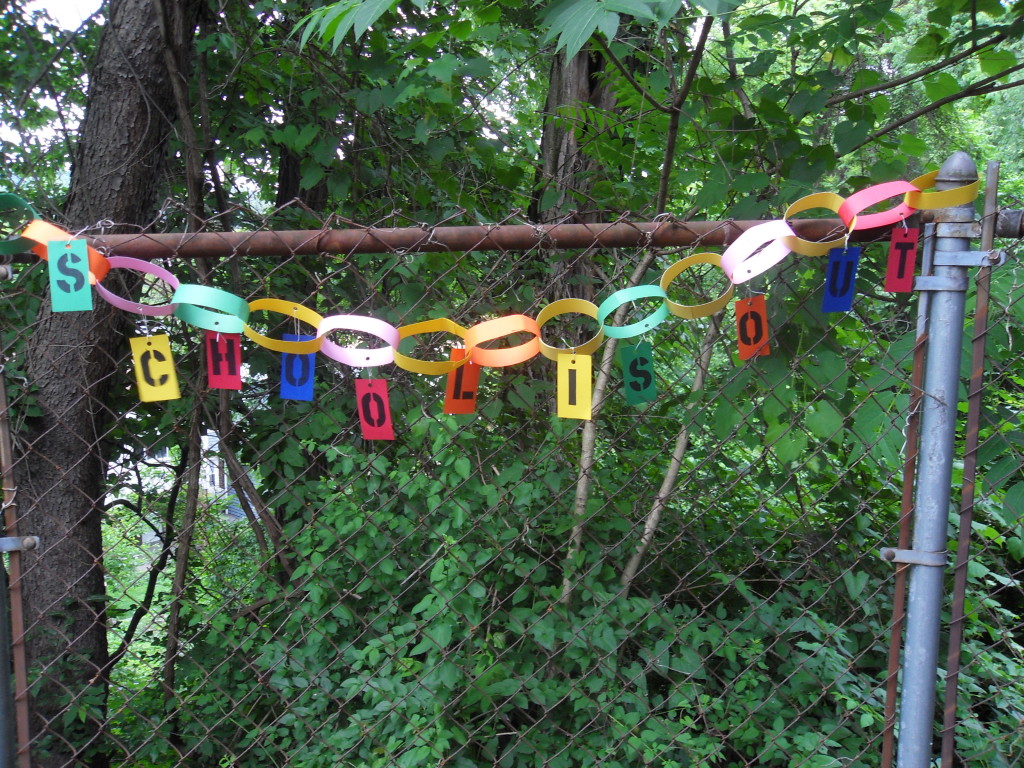
- Make a sign for your clubhouse or to celebrate the beginning of summer and the end of school. Make a loop for every letter of your sign and for the space between the words. Make a loop at the beginning of your sign which will be blank and a loop for the end of your sign which will also be blank. For example, a sign that says “School is out!” will have 11 loops for the words, one for the exclamation mark, two for the spaces between words and an extra loop at each end. That would be a total of sixteen loops.
- Use four or five different colored papers. Measure and cut the colored papers into six or more ½” x 8” strips.
- Glue one strip of paper measuring ½” x 8” overlapping the ends. Then glue a strip of paper measuring ½” x 8” through the first loop. Alternate the colors of the paper strips until you have the required number of paper loops forming a garland. Use the photograph for reference.
- Next, cut paper rectangles in various colors about 1 1/2” by 3.” Make enough to spell out your message.
- Trace a letter on each paper rectangle by using a template, stencil or free hand. Trace any exclamation, question mark or symbol, too.
- Punch a hole at the top of each paper rectangle. Punch a hole in the loops. Do not punch holes in the first and last loops and the loops that represent spaces between words.
- Cut string or pipe cleaners or similar material and loop it through the holes.
- Or use your imagination and glue seeds, glitter, sequins and other decorative objects!
- Tie a string through the first and last loops and tie them on to the fence. Don’t forget to add extra loops when you change the message!


Share this:

