Beat the winter doldrums with a fun craft project! Use it as a Valentine’s Day decoration, give as a gift
or use it all-year round! Super easy and cheap to make.
Materials:
Shells in different sizes
Strand of pearls or beads
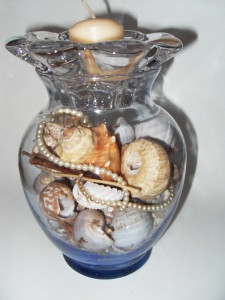
Large clear vase with a neck (See photo)
Small votive/candle holder (make sure it fits into the opening of the vase)
Small candle or tea light that fits into the votive holder
Optional: Ribbon (the neck of the vase will decide the width and length of the ribbon)
1. Wash and dry the vase and candle holder/votive so that they shine.
2. Let the shape of the vase dictate where the shells, pearls and other objects of choice will lay inside the vase.
3. Intertwine one strand of beads or pearls. Add some shells. Mix again.
- Place the larger shells and pearls or beads next and then intertwine another strand of beads or pearls.
- Finally, arrange the medium objects on top. Add the last strand of pearls or beads. Mix. Make sure there is enough room for the candle holder/votive which should protrude above the neck of the vase just enough so that it is noticeable.
- Optional: Tie a bow around the neck of the vase
If the vase is narrow at the bottom, and widens just below the neck, place the small ones on the bottom. Refer to the photo of the finished craft.
Substitutions for the vase:
Potpourri
Small handmade soaps
Beads
Buttons
Heart-shaped paper cutouts
Ribbons
Mix it up!
Substitutions for the votive/candle holder:
Flower bud
Tiny beads
Colored water
Potpourri


Share this: