What is a mobile? A mobile is a construction made up of lightweight parts suspended by threads that attached to fine wires.
Now take the banner designs and use them to make mobiles. See how they change when you go from a flat design to a three-dimensional design. (See the tutorial below the following information.)
MATERIALS
Here are some basic supplies that you will need on hand for all the mobile designs:
Scissors
Wire, sticks, pencils, etc for arms
Compass
Thread, light and heavy weight
Poster board
Colored pencils and pens
Glue
Felt
Pencil and ruler
Recyclable materials
Tracing paper
Whole puncher (optional)
ADDITIONAL STUFF YOU SHOULD KNOW
Making a circle and a cone:
Technique #1: use a round object and trace.
Technique #2: Use a pencil compass to allow you to make a large or small circle. To find the diameter, measure circle from one edge through the center to the opposite side.
Technique #3: Cut out a circle. Cut out a section like a slice of a pie, from the edge to the center. Remove the section. Bring one edge over to the other side. Glue the overlapped edge. The larger the section you cut out, the taller and thinner to cone.
Technique #4: How to attach a thread: Thread objects by using a large needle. Push the needle through the shape at the balancing point and pull the thread until a small length is left. Then make a knot at the top of the shape. Cut off excess thread. When attaching the thread to the wire, tie it tightly.
BIBLIOGRAPHY
Holz, Loretta. Mobiles You Can Make. New York: Lothrop, Lee and Shepard Company, 1965.
Zubrowski, Bernie. Mobiles: Building and Experimenting with Balancing Toys. New York: Morrow Junior Books, 1993.
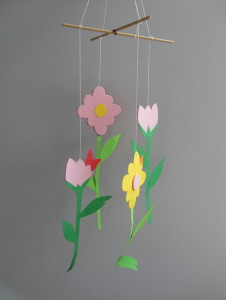
Spring Mobil
Ages: 5 – 12 years
Time: ½ hour – 1 hour
MATERIALS:
Construction paper or Fun Foam in 4 pastel colors
Eraser/ Pencil
One dowel rods cut to 12”
Tacky glue or glue stick
Patterns from the Banners project
Hole puncher
Ball of jute or string or wire
Scissors
1. Ask an adult to cut the dowel rods so that you have two. Cross them in the middle and tie them tightly with a piece of string or jute or wire. Lay aside.
2. Select the paper or Fun Foam or use the two materials together. Trace and cut shapes from the patterns used for the Spring Is Here! Banner. Vary the sizes of the flowers. Add a yellow circle for the center of the daisy.
3. Poke a hole near the top of the paper or Fun Foam shapes with a pencil or use a hole puncher. Then, lace a piece of string or jute or wire 6” to 8” in length through the hole at the top of each shape. Poke a hole at the bottom of the flowers and have some of them cascade. Tie the shapes to the dowel rods. To balance the mobile (sometimes called making the mobile level), place two or more shapes on each dowel rod and be sure that some of the shapes hang lower (or higher) than some of the others. Ask an adult for help if you need it.
4. Tie a piece of string in the middle of the two dowel rods for hanging. Does your sculpture move? What makes it move? How is this design different from the banner design? What are the differences? What are the similarities?
VARIATION: Instead of using dowel rods, dangle the strings from a clothes hanger. Vary the lengths and hang from an area where vibrations and the wind can make the dangling objects move.
ADDITIONAL INFORMATION FOR MAKING ADVANCED MOBILES
How to make wire arms: Make loops on the ends. This will make it easier to tie on shapes. It is best to use needle-nose pliers and wire with a gauge of 14, 1, 18 or 20. Cut the wire to the desired length and bend until it is slightly curved. This will make the objects look more graceful as they balance from the wire. The curve also makes them look more graceful as they move in the air.
How to make a smooth curve: Grip one end of the wire with one hand and gently pull its length between the thumb and forefinger of the other hand, bending as you pull.
How to make a loop: Grasp the end or the wire with the needle-nose pliers. Hold the wire as you twist to form a circle. If you are tying on the objects, close the circle completely. If you are slipping on a loop into the circle, leave it slightly open. Close the loops when the mobile is complete. Hold the wire so that the eyelets or circles are on the under side of the arm when attaching the shapes to the mobile.


Share this:

